
Thursday, June 7, 2012

Salad Spinner Art and Science
To kick off the summer farmer's market season, I decided to do one of my kids' all time favorite art and crafts at my table: Salad Spinner Art. Everyone loves Salad Spinner art. Seriously. Grown adults like to stop and play as well.

It's a pretty simple concept. Select your favorite washable poster paints and thin them with a bit of water. Use a spoon, eyedropper (excellent for fine motor skills) or paintbrush to add drops, blobs and splatters of paint on a paper plate. Then put the plate into a salad spinner and spin it.


The fun thing is that you can make this a great little science experiment too. Here are some questions you can try to answer:


It's a pretty simple concept. Select your favorite washable poster paints and thin them with a bit of water. Use a spoon, eyedropper (excellent for fine motor skills) or paintbrush to add drops, blobs and splatters of paint on a paper plate. Then put the plate into a salad spinner and spin it.


Viola! You have a beautiful piece of artwork. The key to success is to avoid putting too much paint on at once. That can be a real mess, and the colors just muddle together into a yucky brown. Some kids like to put colors on randomly. Other like to make patterns, which can yield great results. One girl painted her whole plate one color, then added drops over it, which looked a bit like tie dye when it was done. Another boy added color in layers, one at a time, which made some really lovely, subtle blends.
If you're feeling really adventurous, lay down a thicker layer of paint and let it tack up a bit. Put the plate in the spinner and place a handful of marbles in there as well. Give it a spin, starting and stopping randomly, even shaking the spinner gently, and you'll get what I like to call "slug tracts." You can also put globs of thinned white glue, sprinkle on colored sand or glitter and spin it. (Use more than I did for the example below.) It's all kinds of awesome.


- Does the thickness (viscosity) of the paint affect the artwork? the distance the paint moves across the plate? (For older kids, actually plan ratios of paint to water and test each on the same plate.)
- Does the type of paint used affect the artwork? in what ways? (Compare poster paint, watercolors, acrylic, food dye...)
- Does the speed of the spinning matter? Does it affect coverage of the plate? the shape of the artwork? the distance the paint travels on the plate? (Use a stopwatch to determine spins per minute. Older kids can test the effects of positive and negative acceleration, too.)
- Does the amount of paint used affect the area of the plate covered after the spin? the shape of the final outcome? (Carefully measure teaspoons, tablespoons, etc.)
- Does the type of plate used affect the artwork? (Compare uncoated paper plates to coated ones or styrofoam.)
And once you're done with that, give a go at exploring centrifugal motion! Your salad spinner can make a great centrifuge in a pinch. I just cut up egg cartons, glue or tape them together and add test tubes of various liquids. You can use small jars or the plastic tubs that sometimes come with bouquets of cut flowers, so long as you cap them well with aluminum foil and tape. Then fill each tube with an equal amount of liquid. (OJ with lots of pulp and vinaigrette salad dressings work particularly well.) For the best results, be sure to balance your centrifuge and SPIN! You're going to need to keep it spinning for a few minutes, so taking turns makes sense, but you will be able to get separation.

Anyway, it's tons of fun. I hope you'll get out your salad spinner today and have some fun. Be sure to post your artwork or the results of your experiments!

Tuesday, June 5, 2012
Button it!
In honor of 30 Days of Creativity, "global social initiative encouraging people to create stuff (anything) every day for 30 days in June," I've set up some crafty playdates for myself with friends. Yesterday, I got together with June Nezamis, my favorite math teacher in the whole world.
June pulled out a book she had picked up and wanted to try. It's called Button It Up: 80 Amazing Vintage Button Projects for Necklaces, Bracelets, Embellishments, Housewares & More. You see, June had recently come into a huge button stash, and wanted to put it to good use. Since I come from a long line of button hoarders myself, I was game.
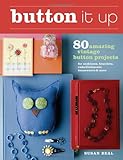


We decided to make the cute little owl on the front cover. Unfortunately, the book didn't provide a template, so just traced the picture in the book onto plain white paper, folded it in half and cut it out.
Since we wanted to reuse as many previously loved materials as possible, we cut our owls out of retired jeans. Then we added our buttons and sewed them up. Instead of machine sewing the pieces together, we opted to use a blanket stitch for a decorative touch. We even found buttons to use as beaks!
They came out really cute, though clearly my template needs some work. I made the one the left.

This project is quick enough to hold the interest of fairly young kids and easy enough for beginners. Judging by the number of hugs and giggles my little guy got when I pulled him out of my purse for my daughters and their friends, it's definitely a hit! In fact my girls want to make their own this afternoon. And June plans to perfect her pattern to make some for gifts and, perhaps, even sell at craft fairs.
I can't wait to check out the other projects in the book. There are tons of jewelry ideas I can't wait to get my hands on. Button crafting could make great summer projects for the girls.
If you want some other fun project for buttons, there are plenty of ideas out there. For example, All Buttoned Up: 10 Fun, Functional, and Funky Vintage Button Projects has some simple projects to get you started.
June pulled out a book she had picked up and wanted to try. It's called Button It Up: 80 Amazing Vintage Button Projects for Necklaces, Bracelets, Embellishments, Housewares & More. You see, June had recently come into a huge button stash, and wanted to put it to good use. Since I come from a long line of button hoarders myself, I was game.
We decided to make the cute little owl on the front cover. Unfortunately, the book didn't provide a template, so just traced the picture in the book onto plain white paper, folded it in half and cut it out.
Since we wanted to reuse as many previously loved materials as possible, we cut our owls out of retired jeans. Then we added our buttons and sewed them up. Instead of machine sewing the pieces together, we opted to use a blanket stitch for a decorative touch. We even found buttons to use as beaks!
They came out really cute, though clearly my template needs some work. I made the one the left.
This project is quick enough to hold the interest of fairly young kids and easy enough for beginners. Judging by the number of hugs and giggles my little guy got when I pulled him out of my purse for my daughters and their friends, it's definitely a hit! In fact my girls want to make their own this afternoon. And June plans to perfect her pattern to make some for gifts and, perhaps, even sell at craft fairs.
I can't wait to check out the other projects in the book. There are tons of jewelry ideas I can't wait to get my hands on. Button crafting could make great summer projects for the girls.
If you want some other fun project for buttons, there are plenty of ideas out there. For example, All Buttoned Up: 10 Fun, Functional, and Funky Vintage Button Projects has some simple projects to get you started.
Thursday, May 31, 2012
The Tomato Business
When we started talking about our garden for the year, my girls were adamant about growing cherry tomatoes. Usually I do a few heirloom slicing tomatoes, a few Roma's for sauce and then various grape tomatoes, like Yellow Pear, for snacking. This year, though, they wanted proper cherry tomatoes.
Following on that though, the girls has another: Wouldn't it be awesome to sell tomatoes at the Farmer's Market? The kids and I spend a fair amount of time at the market over the summer and early fall, because I do free crafts and games for kids at the Blairstown market. To my girls, selling at the market is pretty much the apex of vegetable growing. It is somethign to aspire towards.
Obviously, I couldn't let that ideas get away. So, off we went for seeds and starter trays. The trays turned into quite the discussion at the store, because there are so many different types available now. It was a great opportunity to talk about "value added" items and how you can trade money to save time or make up for minimal expertise by selecting more expensive items. In the end, the girls selected a fairly inexpensive Jiffy seed starter greenhouse set.

We also spent time comparing the various tomato seeds and discussing why organic seeds are more expensive that conventional. This led to a talk about the practices used by different seed companies. And, of course, there was a discussion about the various varieties of cherry tomatoes available, planting times, days to maturity, etc. All of which led to a discussion about why it may be a better idea to research seed companies and use mail order catalogs next year, both for better price and better selection.
The next day we got to work planting the seeds. The girls wanted to know why you plant multiple seeds in each pot, then cut all but the strongest later. It was a great chance to review the fact that not every seed germinates and that you want to only keep the one strongest plant, rather than allow all the plants to compete for resources like water and sunlight, making them all weak. In total, we were hoping to have 36 cherry tomato plants!


By the way, I wanted to share a handy tip, for planting any smaller seed, passed down from my dad. We used toothpicks to make the tiny holes needed for the seeds. Then, touching the wet toothpick gently to the seed picks it up and makes it easy to transfer to the soil.

We also took to time to figure out a budget for how much their tomato business would cost to start and operate. We determined what the cost would be per pint of tomatoes we raise, and what we planned to charge for the produce. We factored in the cost of the initial seeds and pots, the soil, water and fertilizer over the season, pint containers to sell the tomatoes in, and even a fee to the market for selling our tomatoes. In the end we set a goal for how much we hope to make off of the project, after paying back expenses.
Before long, our plants germinated! Huzzah! Lots of leafy green. But the girls noticed that not every soil pellet had a plant. So I set Caitie to the task of counting those that had grown and we created a pie chart based on the data. We also talked about how we could calculate and express our germination rate. Now they're ready to go in the ground, and we'll be watching to see how they do from here.

Following on that though, the girls has another: Wouldn't it be awesome to sell tomatoes at the Farmer's Market? The kids and I spend a fair amount of time at the market over the summer and early fall, because I do free crafts and games for kids at the Blairstown market. To my girls, selling at the market is pretty much the apex of vegetable growing. It is somethign to aspire towards.
Obviously, I couldn't let that ideas get away. So, off we went for seeds and starter trays. The trays turned into quite the discussion at the store, because there are so many different types available now. It was a great opportunity to talk about "value added" items and how you can trade money to save time or make up for minimal expertise by selecting more expensive items. In the end, the girls selected a fairly inexpensive Jiffy seed starter greenhouse set.
We also spent time comparing the various tomato seeds and discussing why organic seeds are more expensive that conventional. This led to a talk about the practices used by different seed companies. And, of course, there was a discussion about the various varieties of cherry tomatoes available, planting times, days to maturity, etc. All of which led to a discussion about why it may be a better idea to research seed companies and use mail order catalogs next year, both for better price and better selection.
The next day we got to work planting the seeds. The girls wanted to know why you plant multiple seeds in each pot, then cut all but the strongest later. It was a great chance to review the fact that not every seed germinates and that you want to only keep the one strongest plant, rather than allow all the plants to compete for resources like water and sunlight, making them all weak. In total, we were hoping to have 36 cherry tomato plants!


By the way, I wanted to share a handy tip, for planting any smaller seed, passed down from my dad. We used toothpicks to make the tiny holes needed for the seeds. Then, touching the wet toothpick gently to the seed picks it up and makes it easy to transfer to the soil.

We also took to time to figure out a budget for how much their tomato business would cost to start and operate. We determined what the cost would be per pint of tomatoes we raise, and what we planned to charge for the produce. We factored in the cost of the initial seeds and pots, the soil, water and fertilizer over the season, pint containers to sell the tomatoes in, and even a fee to the market for selling our tomatoes. In the end we set a goal for how much we hope to make off of the project, after paying back expenses.
Before long, our plants germinated! Huzzah! Lots of leafy green. But the girls noticed that not every soil pellet had a plant. So I set Caitie to the task of counting those that had grown and we created a pie chart based on the data. We also talked about how we could calculate and express our germination rate. Now they're ready to go in the ground, and we'll be watching to see how they do from here.

Making toons with iPad... for FREE
Our family recently bought a shiny new iPad 3. For the kids education... totally. It's an amazing device, of course. My girls took to it quickly, playing games and exploring. One thing my eldest daughter wants to do is make movies, and I'm hoping that the iPad will give her some tools for that purpose. Caitie and I decided we'd give cartoon making a try first.
There are dozens of apps out there for making everything from simple cartoons to professional animation, with price tags ranging from free to, well, not, ahem, free. In this post, I'm going to focus on free apps that are easy enough for children ages 6 and up to use, but offer enough of a fun factor for older kids (and parents) to enjoy and that require little or no drawing skill.
 Toontastic by Launchpad Toys.
FREE app. Additional character sets $0.99 to $1.99.
All Access for $9.99.
This was my first find, and it remains my favorite. Toontastic works like a puppet show. Pick your background and characters, place them in the scene and record. You can move the puppets around and record your voice. The app lets you resize the individual characters, change their colors and move specific limbs, if you like. You can even draw your own backgrounds and characters if you prefer, using the simple paint program provided. Once you've recorded a scene you can add background music as well. String together as many 1-minute scenes as you like to create your movie.
The app comes with a several backgrounds, characters and props from several different themes that you can mix and match. You can add additional sets for between $0.99 and $1.99. There are presently over 30 sets, each with a background and selection of 2-3 characters and assorted props. Themes include fairy tales, pirates, historical figures, space and rock and roll. For $9.99 you get complete access to all current and future sets.
So why is this app my favorite? It hits a nice balance between being simple enough for my 8-year-old to use it completely independently, while offering enough customization for older users. I also LOVE that when you go to create your video, it explains the basic parts of a story and helps the user lay out a story arc. This is great for children as an educational tool. (Toontastic has a free guide for parents and educators interested in use the app for lesson planning.) Lastly, as a parent, I get notification when my child wants to publish a video to the product's ToonTube, and let's me approve it. Since my kids are still young, I appreciate knowing what they're creating and sharing. That said, uploading to the website was very easy to do, and the notification email provides a simple link to share with family and friends.
On the downside, I will say that sometimes the movement of characters "jams" while recording, and it can be difficult to move arms and legs. I also had trouble orienting the characters to match the backgrounds, and getting the characters to turn as I wanted. There is certainly a learning curve to get the best out of the product, but my kids didn't seem to mind that their cartoons weren't "perfect." And, honestly, neither did I. Toontastic was a win for function and price.


Puppet Pals HD by Polished Play, LLC.
FREE app. Additional character packs $0.99, or Director's Pass for $2.99.
Puppet pals is similar to the above Toontastic, but is definitely meant for an older audience, as it includes political characters and talk show hosts as characters, and the graphics are more gritty and mature. Like Tonntastic, you pick your background (all photographic), add your characters and then record to animate and add voiceovers. Rather than recording short scenes and putting them together, Puppet Pals allows for one long shoot. The app exports to the Camera Roll on the iPad, and from there you can upload it to various online locations, like YouTube.
I did like that it was easier to flip the characters in Puppet Pals, using a simple double tap. And the motion was smoother than in Toontastic. You could also resize characters, and even leave them off the background, pulling them in and taking them off at will. But you couldn't move the limbs or the characters, or change them in any way. You can't add music later within the app, which is a bit of a bummer. You also only have access to one pack of characters, the Fairy Tale pack, with the free app, so there isn't much variety.
Puppet Pals does have one advantage over Toontastic: you can take your own pictures, using the iPad camera, to use as backgrounds. You can even take pictures of people, pets, etc. and use them as characters. (The app allows you to cut our character out from the background.) However, you can only use those features if you pay $2.99 for the Director's Pass version of the program. I could see that as being a really fun feature, and the price point isn't very high.
The pass also gives you access to all the additional character packs, both present and future. Packs, individually available for $0.99 each, include 5 to 7 characters and a background. Themes include monsters, pirates, political and pop-culture, zombie and wild west. Though Puppet Pals is available for free, the Director's Pass holds the majority of the fun.

 Sock Puppets by Smith Micro Software, Inc.
FREE app. Additional content from $0.99 to $4.99.
This app is the simplest of the bunch. With Sock Puppet, you set up your background, pick you puppets, pick your props and scenery, then hit record. You tap on the puppet you want to speak for and when you talk, the app automatically lip-syncs the puppet to your words. Very cool! You can record up to 30 seconds, then the app "scrubs" your voice to make it more cartoon-like. Both photorealistic and animated elements are included, though only some props can be moved during recording. You can resize your puppets too.
The app comes with 6 puppets and 7 backgrounds. In the store, you can buy additional puppets for $1.99. You can also buy upgrades like additional recording time ($0.99 for 90 seconds) or the ability to import your own background ($0.99). Halloween and Alien packs with additional characters, backgrounds, props and scenery are $0.99 each. A VIP Content Pass is $4.99 and inludes all available content and provides as new releases for free.
Of those I cover, this app would be the easiest and most amusing for a younger child. All you need to do is make sure you're speaking into the mic. It also disguises your voice very well, so you don't need to worry about sounding too different for each character. The app takes care of that. It's pretty easy to upload online as well, directly to YouTube or Facebook. Sock Puppets is the quickest to learn and provides immediate gratification.
I may be no artist, but even I had a lot of fun making my own short cartoons. With these free apps you can let your child's imagine fly. And all of them would be excellent for teaching basic storytelling as well. Have fun!
There are dozens of apps out there for making everything from simple cartoons to professional animation, with price tags ranging from free to, well, not, ahem, free. In this post, I'm going to focus on free apps that are easy enough for children ages 6 and up to use, but offer enough of a fun factor for older kids (and parents) to enjoy and that require little or no drawing skill.
Toontastic by Launchpad Toys. FREE app. Additional character sets $0.99 to $1.99.
All Access for $9.99.
This was my first find, and it remains my favorite. Toontastic works like a puppet show. Pick your background and characters, place them in the scene and record. You can move the puppets around and record your voice. The app lets you resize the individual characters, change their colors and move specific limbs, if you like. You can even draw your own backgrounds and characters if you prefer, using the simple paint program provided. Once you've recorded a scene you can add background music as well. String together as many 1-minute scenes as you like to create your movie.
The app comes with a several backgrounds, characters and props from several different themes that you can mix and match. You can add additional sets for between $0.99 and $1.99. There are presently over 30 sets, each with a background and selection of 2-3 characters and assorted props. Themes include fairy tales, pirates, historical figures, space and rock and roll. For $9.99 you get complete access to all current and future sets.
So why is this app my favorite? It hits a nice balance between being simple enough for my 8-year-old to use it completely independently, while offering enough customization for older users. I also LOVE that when you go to create your video, it explains the basic parts of a story and helps the user lay out a story arc. This is great for children as an educational tool. (Toontastic has a free guide for parents and educators interested in use the app for lesson planning.) Lastly, as a parent, I get notification when my child wants to publish a video to the product's ToonTube, and let's me approve it. Since my kids are still young, I appreciate knowing what they're creating and sharing. That said, uploading to the website was very easy to do, and the notification email provides a simple link to share with family and friends.
On the downside, I will say that sometimes the movement of characters "jams" while recording, and it can be difficult to move arms and legs. I also had trouble orienting the characters to match the backgrounds, and getting the characters to turn as I wanted. There is certainly a learning curve to get the best out of the product, but my kids didn't seem to mind that their cartoons weren't "perfect." And, honestly, neither did I. Toontastic was a win for function and price.
Puppet Pals HD by Polished Play, LLC.
FREE app. Additional character packs $0.99, or Director's Pass for $2.99.
Puppet pals is similar to the above Toontastic, but is definitely meant for an older audience, as it includes political characters and talk show hosts as characters, and the graphics are more gritty and mature. Like Tonntastic, you pick your background (all photographic), add your characters and then record to animate and add voiceovers. Rather than recording short scenes and putting them together, Puppet Pals allows for one long shoot. The app exports to the Camera Roll on the iPad, and from there you can upload it to various online locations, like YouTube.
I did like that it was easier to flip the characters in Puppet Pals, using a simple double tap. And the motion was smoother than in Toontastic. You could also resize characters, and even leave them off the background, pulling them in and taking them off at will. But you couldn't move the limbs or the characters, or change them in any way. You can't add music later within the app, which is a bit of a bummer. You also only have access to one pack of characters, the Fairy Tale pack, with the free app, so there isn't much variety.
Puppet Pals does have one advantage over Toontastic: you can take your own pictures, using the iPad camera, to use as backgrounds. You can even take pictures of people, pets, etc. and use them as characters. (The app allows you to cut our character out from the background.) However, you can only use those features if you pay $2.99 for the Director's Pass version of the program. I could see that as being a really fun feature, and the price point isn't very high.
The pass also gives you access to all the additional character packs, both present and future. Packs, individually available for $0.99 each, include 5 to 7 characters and a background. Themes include monsters, pirates, political and pop-culture, zombie and wild west. Though Puppet Pals is available for free, the Director's Pass holds the majority of the fun.
Sock Puppets by Smith Micro Software, Inc.FREE app. Additional content from $0.99 to $4.99.
This app is the simplest of the bunch. With Sock Puppet, you set up your background, pick you puppets, pick your props and scenery, then hit record. You tap on the puppet you want to speak for and when you talk, the app automatically lip-syncs the puppet to your words. Very cool! You can record up to 30 seconds, then the app "scrubs" your voice to make it more cartoon-like. Both photorealistic and animated elements are included, though only some props can be moved during recording. You can resize your puppets too.
The app comes with 6 puppets and 7 backgrounds. In the store, you can buy additional puppets for $1.99. You can also buy upgrades like additional recording time ($0.99 for 90 seconds) or the ability to import your own background ($0.99). Halloween and Alien packs with additional characters, backgrounds, props and scenery are $0.99 each. A VIP Content Pass is $4.99 and inludes all available content and provides as new releases for free.
Of those I cover, this app would be the easiest and most amusing for a younger child. All you need to do is make sure you're speaking into the mic. It also disguises your voice very well, so you don't need to worry about sounding too different for each character. The app takes care of that. It's pretty easy to upload online as well, directly to YouTube or Facebook. Sock Puppets is the quickest to learn and provides immediate gratification.
I may be no artist, but even I had a lot of fun making my own short cartoons. With these free apps you can let your child's imagine fly. And all of them would be excellent for teaching basic storytelling as well. Have fun!
Tuesday, May 22, 2012
STEM Expo: Designing Fun
For those that might be interested, I've posted my presentation from the 2012 NSTA STEM Expo. You can enjoy a slide show below.
Key points: Discover what YOU find exciting and fun about an activity, then pass that on to the students. Look for the "ah ha" moment and capitalize on it. Empower students to lead the class and make decisions. Teach innovation, work cooperatively, and learn to love "failure."
I was also asked where I got my ideas. So, I thought I'd share some links.
Key points: Discover what YOU find exciting and fun about an activity, then pass that on to the students. Look for the "ah ha" moment and capitalize on it. Empower students to lead the class and make decisions. Teach innovation, work cooperatively, and learn to love "failure."
I was also asked where I got my ideas. So, I thought I'd share some links.
- Teach Engineering (free)
- Brain Pop (paid, free trial available, each video has associated activities)
- Scholastic (free)
- Design Squad (free, from PBS)
- NOVA Science Now (free)
- Discovery Education (free)
- Teacher Vision (paid, free trial available)
So I hope this gives you some fun ideas to get you going!
Making Do: A Toy Review
I recently returned from the National Science Teacher's Association STEM Expo in Atlantic City. Of course, one of the best parts of any convention is the exhibitor's room. Aisles and aisles of fun new products, services, computer programs and books to buy. And swag. Never forget swag.
One item I picked up was a tube of Makedo. It's a "reusable system for creating things from stuff around you." Basically there are these plastic blue "pins" and "clips" that easily join together to connect paper, cardboard, foamboard, fabric, whatever. If you want to disconnect those pieces, you squeeze the clip and take it apart. Easy peasy. There are also joints that you can use to make angles and moving parts. The kit came with a safe saw and punch tool, to help prepare cardboard for being attached.
My interest is in having a simple, reusable system that the kids in my classes could use to build, basically anything. Which meant it was time for my product-testing daughters to give it a whirl.
We dragged out an old pizza box and some paper towel tubes and set to work. I can say that the pins and clips were easy to use. Even Gwen (6 years old) could use them. same goes for the hinges. Both girls had trouble with the safe saw. I think it likely works better for thicker corrugated cardboard than we had. The punch was also tough for them to use. Again this may be a materials issue. In the end, we found a pair of scissors and a standard hole punch were effective.

I didn't show the girls the product insert or video.I just demonstrated how to use the toy. Given free reign, both girls set to making robots. Gwen worked with me to make a root bird. Caitie (8 years old) went for something more traditional. As we were wrapping up, Gwen swooped about with her bird saying, "Look Mommy, I'm being creative!" (I love kindergartners!) Caitie however was on to planning her next project: a car. But only after she takes some time to decorate her robot so that he can visit school with her in the morning.


(Yeah, I know. I don't usually do product reviews. But I found so many neato things at the Expo, I wanted to share some. I have not received any compensation for this review.)
One item I picked up was a tube of Makedo. It's a "reusable system for creating things from stuff around you." Basically there are these plastic blue "pins" and "clips" that easily join together to connect paper, cardboard, foamboard, fabric, whatever. If you want to disconnect those pieces, you squeeze the clip and take it apart. Easy peasy. There are also joints that you can use to make angles and moving parts. The kit came with a safe saw and punch tool, to help prepare cardboard for being attached.
My interest is in having a simple, reusable system that the kids in my classes could use to build, basically anything. Which meant it was time for my product-testing daughters to give it a whirl.
We dragged out an old pizza box and some paper towel tubes and set to work. I can say that the pins and clips were easy to use. Even Gwen (6 years old) could use them. same goes for the hinges. Both girls had trouble with the safe saw. I think it likely works better for thicker corrugated cardboard than we had. The punch was also tough for them to use. Again this may be a materials issue. In the end, we found a pair of scissors and a standard hole punch were effective.

I didn't show the girls the product insert or video.I just demonstrated how to use the toy. Given free reign, both girls set to making robots. Gwen worked with me to make a root bird. Caitie (8 years old) went for something more traditional. As we were wrapping up, Gwen swooped about with her bird saying, "Look Mommy, I'm being creative!" (I love kindergartners!) Caitie however was on to planning her next project: a car. But only after she takes some time to decorate her robot so that he can visit school with her in the morning.


Subscribe to:
Posts (Atom)