Tuesday, December 31, 2013

Koch Snowflake cards

Like most self respecting nerds, I love fractals. So what better way to celebrate winter than creating a fun card based on the famous Koch Snowflake (also know as the Koch star and island)!


fractal is a geometric figure that has some pretty awesome special features. They have "self symmetry," creating detailed repeating patterns that are often described as "the same from near as from far." They're found all over the place in nature and are used in math and science in a variety of applications. 
One of the easiest to create by hand, and also one of the easiest to understand, is the Koch Snowflake. First described by Helge von Koch in 1904, this fractal is based on an equilateral triangle. To build it one, you create an equilateral triangle, then remove 1/3 of one side of the triangle and replace it with an new, smaller equilateral triangle. You repeat this process on each side, then repeat it on each side of each new triangle, and so on. The result is a shape that can literally have infinite perimeter, but finite area. Cool right?
So, for an extra nerdy card, I used the Koch Snowflake shape and created a fun, glittery pop up.
The process is simply to make a Koch snowflake template, trace that into a card and cut around the shape with a craft knife, leaving the shape attached to the base at a few points. Then fold the pop up in the opposite direction of the card, creasing the contact points carefully. Finish by backing with contrasting cardstock to create the front of your 4.24" x 5.5" card.

To make it more festive, I created snowflake "covers" that were just the Koch snowflake. These I embossed and glittered to make them stand out beautifully. I also used the inside of the double snowflake to create a custom stamp, simply tracing it onto craft foam and cutting it out, then adhering it to an acrylic block with some double-stick tape. I used it as I would any other stamp. This card reads "Baby, it's cold outside."


Now, I'll have really detailed instructions up on CRAFT soon, I hope, but in the mean time, why not just grab my templates and make a card the easy way?

Print the PDFs below onto cardstock and cut until your heart's content!

If you have a digital cutter, like I do, this all becomes very easy, indeed! I have an old first generation Silhouette from Quickutz. You can pick them up for about $100 on eBay, and they are amazingly useful. I use the free software Inkscape to design my digital cutting files and then the free software for the Silhouette to manipulate and cut the shapes. It's totally awesome!
Anyway, if you have such a machine, all you need to do is download the appropriate DXF or SVG file and let your computer do the work for you! You may opt to throw in a perforation or scoring line down the center when you cut to make folding easier, but I just used my Scoring Board. Now you can make cards for all your nerdy friends!! Huzzah!

Anyway, I hope you have fun. Be sure to share pictures of your cards!

Monday, December 30, 2013

MORE fractal cards!

After I made the last fractal Christmas card, my daughter pointed out that it also looked a lot of like a pile of present. (Kids!) So I decided to play with that idea a bit.

I selected a set of coordinating scrapbook papers, and cut the inside of the card just as I did last time. For a quick review...


For this version, it's important to measure and cut accurately, so that the pieces we cut for "presents" fit well. That said, go ahead and cut a second insert from a piece of plain or scrap cardstock. We'll use this for templates. Just cut along the folds.


Then it's time to trace and cut. We'll need one large piece as the central present. Then cut three of the mid-sized present, one from each of three types of paper. Lastly, cut nine small pieces -- two each from the three different papers and three from the last.


Now, we get to play paper tetris. Ink the edges of all the the present pieces, so that they have some depth when attached. Use a bit of glue stick to attach the paper pieces onto the base. Then attached the base to the outside of the card. Ink the edges and you're nearly done.


I added some strips of paper for "ribbons" and attached the inside to the outside. Then I gave the front a bit of decoration.


Add the sentiment and I'm good to go! This got me thinking, what other fractal-based patterns can I cut and make into cards. As it turns out, I am not the only one who is obsessed with this technique. Yale offers a fun free pattern using blocks. They actually have a whole lab activity using Cantor sets to make fractal folds. There is also a book called "Fractal Cuts" by Diego Uribe, that you can buy new or used on Amazon. (Yea, I totally ordered it.) So I played with another boxy design.


Then using the same template method as above, I made another "present" card.

Sunday, December 29, 2013

Active Indoor Fun at the Discovery Museum

The family and I are on our annual holiday trip to Fairfield, CT, visiting my in-laws. One of our favorite places to check out while up north is the Discovery Museum in Bridgeport, CT. They have a great Planetarium, several permanent exhibits -- a whole floor on space, and energy exhibit, a sound and light gallery, sport science and LEGOs -- as well as visiting exhibits that change twice a year. Recently the museum added a First in Flight exhibit in tribute to Gustave Whitehead as well.


Let's start with Gustave. I know most of us think Wright Brothers when we think First in Flight, but folks in Connecticut can get fussy about that. See, research Jon Brown, building on the work of locals Stella Randolph, Andy Kosch and Retired Air Force Major William J. O’Dwyer, recently showed that Gustave Whitehead was in fact the first to build and fly an airplane. Whitehead's "Number 21" took off on the Bridgeport-Fairfield line on August 14, 1901, two years before the Wright's accomplished the feat. Discovery hosts a wonderful half-sized model of the plane as well as information about Whitehead. 


The first visiting exhibit we encountered was the Adventure Science. This indoor low ropes course was a complete blast! The museum's website describes it as "highly interactive" and they aren't kidding. There are zip lines, climbing structures, bridges, ropes and more. The installation is meant to highlight the museum's new Adventure Park, a 5-acre aerial forest park opened last year. Both exhibits were designed by Outdoor Ventures, a Southport Company that specializes in such constructions. 

The entire exhibit was designed to demonstrate scientific principles and physics concepts such as gravity, the interaction of forces and more. The exhibit also serves to educate about the natural sciences and structures of the forest, human physiology and even the psychology over interacting with the activities. 


According to museum director, Jeffery Bishop, “The Discovery Museum is all about interactive learning and we saw this as an ideal way to capture people’s imaginations like nothing else. This exhibit will prove beyond a shadow of a doubt that science can be a lot of fun!” I'd say they met their goal. This exhibit is aces!


The second visiting exhibit was also full of hands on fun. "Take Flight" had activities for building paper airplanes, rockets and helicopters as well as great launchers to set them moving. My niece Maddie, loved using the metal tubes provided to shape rockets form plain paper. The bicycle pump launcher packed a punch, sending the rocket far and fast. 


Caitie loved making heli-cup-ters and flying them in the vertical wind tunnel. Using a simple Italian ice cone, kids cut flaps along the edges to create a whirling flyer. Gwen preferred a more traditional folded paper model. Either way, the girls had a blast sending them zooming into the air over the blower. (Hint: To do this at home, try an inexpensive box fan on blocks and pointed towards the ceiling!)


Before leaving the exhibit we also gave the classic paper airplanes a try. The museum provided instructions for two examples, so that kids could compare how they flew while learning about lift and wing shape. The launcher here was similar to a much sturdier version of the rubber band shooter that's easy to attach to your own paper airplane at home. I loved the use of hula hoops and other targets!


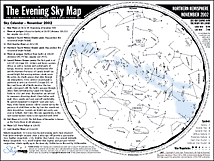
While at Discovery, we also took in a show at the Planetarium. In addition to various educational movies, the museum offers "The Skies Tonight" shows that cover the constellations, planets and other heavenly bodies you can find at that time of year. They even provide a star map to take home, to help you out once you're in the dark. The presenter was very thorough, interesting and knowledgeable, but kept the presentation quick paced enough that it was perfect for kids. (The museum suggested ages 8 and up, but my 7-year-old had no trouble sitting through the presentation. 


The presenter also showed a great short movie entitled, "Two Small Pieces of Glass" about the 400 year history of the telescope. Produced by PBS in 2009 for "International Year of Astronomy," this fun film explained all about how telescopes work, how they've changed over time, how they've been used throughout history and how they continue to shape out knowledge of the Universe. Everything from basic refraction and reflection through red shift were covered using language than anyone can understand. And as an added bonus, PBS provides a whole teacher's guide with activities and further resources, so you can keep learning after the show.

The Evening Sky Map (front) The Evening Sky Map (back)

As a side note, the film's plot was centered around a star party the two main characters were attending. The presenter encouraged us to look for and attend star parties in our local area. I MUST do this. Luckily, there are websites out there to help you find local star parties!

There are lots of little gems throughout the museum, from "The Sun as Art" photographs to the signed prints by Buckminster Fuller (below). Some of the exhibits are certainly in need of rehab, but still provide a lot of fun and education. Plan at least 3 hours to visit, so you can check out everything offered.


So if you happen to be anywhere near Bridgeport, CT between now and March 2014, you should definitely head over to the Discovery Museum and check out all their great exhibits. Have fun!

(Note: I was NOT compensated in any way by Discovery Museum or its affiliates. I just think it's a cool place. You should take a minute to donate!)


Thursday, November 14, 2013

Fractal Christmas Card

We've been studying fractals with the Kaleidoscope Cooperative for Science and Math. As part of that study, we explored Sierpinski's Triangle, a fractal in which equilateral triangle shapes are removed according to a specific set of rules, forming a repeating pattern.

I wanted to extend the 2D version we made in class to a 3D project. Luckily, I found the Fractal Foundation and their instructions to create a triangle fractal cutout. By making repeated cuts in folded paper you can create a shape similar to a Sierpinski's triangle. And when you're done, it looks like a Christmas tree. Which makes it a most excellent holiday card!


The kids had a great time making these, but I wanted a little more refined version for my nerdier friends and family members. So I pulled out my craft supplies. For this project you need: colored cardstock, a ruler, a pencil, scissors, a glue stick, a star punch, an embossing folder and embosser, and assorted inks.


I started by cutting a piece of green cardstock to 8.5 x 5.5 inches. I folded this in half to create a 4.25 x 5.5 inch card. Using my ruler I marked the middle of the card and drew a line from the folded side to midway across.


Then I cut along the line, folded one section away from the folded edge and creased well. Then I unfolded the flap and inverted the tab, pushing the fold inwards.


Refolding the paper, and tucking the tab inside, I once again used my ruler to measure the halfway point on each of the side "steps." I drew a line halfway across the step. Then it was cut, fold, invert.


 I repeated the cycle once more. After this point the paper was too thick to fold and cut neatly. I you used copy or origami paper you might be able to get more detail.


Once all the tabs were done, I used the edge of my ruler to crease them really well. Then I un-inverted the folds to flatten the paper and ran the card through an embosser. I also trimmed the paper by 1/4" all around and inked the edges. When that was done, I carefully refolded the tabs to create the pattern and sprayed the front with gold ink.

I cut a piece of red cardstock to 8.5 x 5.5 inches, folded it into a 4.5 x 5.5 inch card and embossed that as well, inking the edges when it was done.

I applied glue to the back of the triangle tree and carefully attached it to the inside of the red card, pressing down well and being sure to center the green card. I punched a little star from yellow cardstock, folded it in half and used the glue to attach it to the top of the tree. I then decorated the front of the card with some scrap green cardstock and another yellow star.


All I need to do is add a cheery sentiment and this card is ready to add a bit of geek chic to someone's Christmas.