Showing posts with label STEM. Show all posts

Thursday, March 13, 2014

Super Secret Science Challenge FIVE: Parachutes

This week we have new heroes on our side: The B Team. They need to parachute into enemy territory and bug Mr. Fluffy's Lair! Are you the right Science Officer for the challenge? Let's find out, with this week's Super Secret Science Challenge!


Today's list of suggested supplies are:

  • 1 yard of string
  • 1 plastic shopping bag
  • 1 sheet of newspaper
  • 3 sheets of copy paper
  • 1 lunch bag
  • 5 coffee filters
  • 1 8.5x11” piece of aluminum foil
  • A small paper cup
  • 8 paper clips, assorted
  • 1 pipe cleaner
  • Various tapes -- invisible, masking, duct, etc.
  • A small toy as the pilot
To make this challenge even more fun, give your scientist two goals: create a parachute with the longest hang time possible and try to land right on a target. I drop my parachutes from a height of 2 meters (roughly the height of a door frame) with the feet of the "B Team" member as the bottom of the unit. Encourage students to create more than a single parachute for the challenge, as it can be tough to meet both objectives with one or, allow students to move the target to where they predict the parachute will land.

A parachute is a fairly simple creation. It's primarily composed of a canopy made of some type of material, which creates lift (and drag) through the frictional force of air resistance. The parachute is connected to the pilot, who is held in a harness, by lines that connect to the canopy. The pilot is pulled by gravity towards the ground.


Good luck Agents! Hope you have fun making your creations!


Thursday, November 14, 2013

Fractal Christmas Card

We've been studying fractals with the Kaleidoscope Cooperative for Science and Math. As part of that study, we explored Sierpinski's Triangle, a fractal in which equilateral triangle shapes are removed according to a specific set of rules, forming a repeating pattern.

I wanted to extend the 2D version we made in class to a 3D project. Luckily, I found the Fractal Foundation and their instructions to create a triangle fractal cutout. By making repeated cuts in folded paper you can create a shape similar to a Sierpinski's triangle. And when you're done, it looks like a Christmas tree. Which makes it a most excellent holiday card!


The kids had a great time making these, but I wanted a little more refined version for my nerdier friends and family members. So I pulled out my craft supplies. For this project you need: colored cardstock, a ruler, a pencil, scissors, a glue stick, a star punch, an embossing folder and embosser, and assorted inks.


I started by cutting a piece of green cardstock to 8.5 x 5.5 inches. I folded this in half to create a 4.25 x 5.5 inch card. Using my ruler I marked the middle of the card and drew a line from the folded side to midway across.


Then I cut along the line, folded one section away from the folded edge and creased well. Then I unfolded the flap and inverted the tab, pushing the fold inwards.


Refolding the paper, and tucking the tab inside, I once again used my ruler to measure the halfway point on each of the side "steps." I drew a line halfway across the step. Then it was cut, fold, invert.


 I repeated the cycle once more. After this point the paper was too thick to fold and cut neatly. I you used copy or origami paper you might be able to get more detail.


Once all the tabs were done, I used the edge of my ruler to crease them really well. Then I un-inverted the folds to flatten the paper and ran the card through an embosser. I also trimmed the paper by 1/4" all around and inked the edges. When that was done, I carefully refolded the tabs to create the pattern and sprayed the front with gold ink.

I cut a piece of red cardstock to 8.5 x 5.5 inches, folded it into a 4.5 x 5.5 inch card and embossed that as well, inking the edges when it was done.

I applied glue to the back of the triangle tree and carefully attached it to the inside of the red card, pressing down well and being sure to center the green card. I punched a little star from yellow cardstock, folded it in half and used the glue to attach it to the top of the tree. I then decorated the front of the card with some scrap green cardstock and another yellow star.


All I need to do is add a cheery sentiment and this card is ready to add a bit of geek chic to someone's Christmas.

Math Fun with Dice

I hear it a lot. "I hate math." "Math is boring." "I'm no good at math." "I just don't get it." It really doesn't have to be that way. I swear!


One of the best things about math, especially at the elementary and middle school levels is that so much can be learned through game play. Addition, subtraction, multiplication, division, negative and positive integers, exponents, currency, probability and even basic algebra can all be practiced through game play.

For this post, I'm going to focus in on dice games, because they are inexpensive, extremely portable and offer tremendous variety. That last one is really important. Any game gets boring after a while, and for kids that hate math, keeping game play fresh is vital.


One of the most popular commercially available games is aptly called "Math Dice." Using three six-sided dice and two ten-sided scoring dice, students can play a variety of games. The most popular scenario is to roll the die and figure out how to add, subtract, multiply or divide to reach a "target" number. This type of game encourages the kind of problem solving and mental math skills the students need. It can be played independently, collectively or competitively, and has been used in classrooms and for math tournaments for years. At only $6/set, Math Dice is a great addition to any game shelf. There is also a Math Dice Jr. for younger children.

There are other less well-known math games available out there as well -- 4-Way Count Down, Even Steven's Odd, Double Shutter -- just to name a few! And don't forget other games that, while not being specifically made for teaching math, do contain elements that practice important skills. For example, Yahtzee requires a great deal of number play and addition, as do the fun variants on the theme, like Flash and Yamslam.

One of my personal favorites, that you may not have played before, is call Cosmic Wimpout. "In this game that consists of five dice and nothing else, play proceeds by rolling the five Cosmic Wimpout cubes and get points for each 5, 10, or Flash (triplet) that you roll. You can accumulate points towards the Winning Total by ending your turn or risking it all, because if you roll and don't score, you lose all the points for that turn and the next player goes." It's fast-paced, challenging, exciting and tons of fun. Kids will not know they're practicing math. I keep this tube of dice in my backpack at all times. It's just that good. Farkle tends to travel with me too.

Now, say you don't want to have to buy a bunch of games. Maybe you have some dice sitting around at home, lonely and unused. Perfect! You're ready to start playing some math games!

Start with a visit to Scholastic's 4 Great Math Games. There you'll learn favorites like Pig. A player rolls two dice and mentally adds them. This player can keep on rolling and adding to their total for as long as they want. However, if they roll a 1 before they choose to stop, they're total for the round is 0. If they roll two 1's, their entire total is reduced to 0. The first player to reach 100 points wins.

Teachers will appreciate the printable instructions and score sheets at Math Salamanders. My favorite is "Spot the Calculation." In this game, a student roles three dice and makes a calculation. The other player must guess what operations they used to get that answer.

Meanwhile, Activity Village has lots of classic math games like Mountain and Mouse, many of which are perfect for young students who are still learning to identify numbers. For example, in Mountain, you make or print a drawing of the hill with the numbers 1-6 going up the side to the top and then 6-1 down the other. Students start at the bottom of the hill with a marker. The first student rolls a die, hoping for a 1, because they must roll each number in order to move up or down the mountain. If they don't roll the needed number, they can't move. This is great for kids to learn to recognize their numbers and to practice counting with the dots on the dice.

And Didax Education offers a small selection of dice games for algebraic thinking that are great for middle schoolers. You can use their samples, or make your own similar games. It's easy! Try this: Onto index cards, either copy a few simple algebraic expression from a textbook or  make your own. Mix up the cards and place them face down on the table. A student, flips the top card and rolls a die. She then substitutes the number on the die into the expression for the variable and solves. Each player rolls their die and does the same, writing down their answer. Play continues until all the expression cards are used. Players then add their solutions together. The highest number wins.


For teaching negative and positive numbers, I like this simple game. First print or create a simple number line and find a small marker that fits on it. Then find two dice, each a different color. One color represents a positive number, the other negative. The student rolls both dice and selects one to start with. They mark that number on the number line. Then using the other, they count from that spot the amount on the other die, moving in the correct direction. The place they land is the sum of the two numbers. I usually have them write out the equation then. Once they get the hang of this, I add dice, making the equations longer or swap in 10 or 12 sided die to practice with larger sums. This game is especially useful for students that don't understand how positive and negative integers work.

So I hope you have some new ideas for fun dice games to play with your favorite math student.

Thursday, October 24, 2013

Super Secret Science Challenge FOUR

This week, field agents Misty, Sunshine and The Weather Weasel have been captured by the evil Mr. Fluffy. They need to build a super complicated, crazy contraption to distract the villain before he can use his Puppinator to change all of the world's dogs into cats!


This week's materials are:

  • 6-4x6 and 2-3x5 Index cards 
  • 3 dixie cups 
  • 4 bamboo skewers 
  • assorted cardboard (corrugated and chipboard) 
  • 6 feet of twine 
  • 10 paper clips 
  • 10 assorted rubber bands 
  • 2 marbles 
  • 1 ping pong ball 
  • 3 toilet paper tubes 
  • 1 balloon 
  • 4 drinking straws 
  • 4 pipe cleaners 
  • 2 clothes pins 
  • 10 tongue depressors 
  • 1 disposable spoon 
  • masking tape and scotch tape 
This week's challenge encourages students to build a Rube Goldberg Machines. These contraptions are designed to make simple tasks much more complicated, often with silly results. Aside from being tremendously creative projects that are a lot of fun to build, Rube Goldberg Machines also give students the opportunity to explore simple machines.

Simple machines -- such as inclined planes, levers, wheels and axles, pulleys, wedges and screws -- are mechanical tools that make work easier by changing the direction or amount of force used to complete a task. We use simple machines every day, and when we combine them, we can create complex machines. Challenge older students to identify examples of simple machines within their crazy contraption.

Have fun! And please, don't hesitate to share your pictures of your machines!

We'll be back next week with another Super Secret Science Challenge. You can take the challenge at Kaleidoscope, or bring it to your school or club!

Like this? Help support this and other fun programs with your donation.


Saturday, October 5, 2013

Making Mythbusters: Time for a Toast

As part of our homeschool Cooperative for Science and Math, we've been exploring the experiments featured on the Mythbusters show. Last week, we decided to test one of my absolute favorite myths: "Toast will always fall buttered side down."


There are few ways to look at this. The first is as a coin toss. Flip a coin and you should have about the same odds for a tails up as for a heads. This is basic probability. You can test it yourself. Actually I highly recommend that you do! (Mythbusters: The Explosive Exhibition has a lesson plan, called "Flip It," all about it.)

Get some friends together, as we did in class, and collect as much data as you can. Aim for 100 coin tosses, making a simple tally sheet to record which flips come out heads or tails. Then you can compare the ratio of heads to tails, create a bar graph, even determine the percentage error!

Now that you know what the data looks like if both sides of the coin -- or toast, in this case -- are equal, what happens if you make the sides unequal.

There are a lot of questions you could ask, as you design your experiment. You want to make sure you know your variables and control for as much as possible. Some questions we had:

  • Do the pieces of toast need to be the same shape? Can we control for the the shape of the toast? How?
  • Does the mass of each piece of toast matter? How can we control for the mass?
  • Does the amount of toasting affect how the toast falls? Do they need to be equally browned on both sides?
  • Does the amount of butter on each piece need to be the same? How can we control the amount of butter on each piece? Does it matter how we apply the butter? Can we use something other than butter -- such as vegetable shortening, peanut butter or jelly? 
  • Does the height from which the toast is dropped make a difference? Does it matter how the toast is held when it is dropped? Does it matter if the same person does the drop each time?
  • What would happen if we spread butter on both sides of the bread? Or none?
  • How many pieces of toast should we drop before we can feel sure about our results? 
The toast myth gives a lot of room for experimental design. Make sure you let the kids take the time to decide what questions are most important to them.

We decided to use 1 tsp. of vegetable shortening (easy to measure) on one side of toast, dropped from the height of a step ladder by an adult, with the toast held vertically before the drop. We further tested the affect of the shape of the toast on the fall -- half of the toast was selected for similarity by sight; the other half was cut to a uniform circle using a cutter. We dropped 8 pieces of toast for each shape. 


In the end, our results were very much the same as the Mythbusters results from the show! We didn't get exactly even results. In fact we found toast was more likely to fall with the buttered side up. There are some really interesting reasons for this: period of rotation, moment of inertia and angular momentum all play a role. 

Given enough time to explore, how many variables can you control? Well, we only had an hour, but this could easily be a whole day project. (And time well spent.)

So next time you're having breakfast, maybe you can have some science with your coffee and tea. Enjoy!


Thursday, October 3, 2013

The FIRST Super Secret Science Challenge

This week we had our first Super Secret Science Challenge this week, at the Kaleidoscope Learning Center and at Belvidere Elementary School. Want to play along at home? Check out the video below!


Here are the supplies our Science Officers were given:

  • 3 cups -- one each styrofoam, plastic and paper
  • Various string -- 3 feet of twine and 9 feet of fishing line
  • 1 9" latex balloon
  • 2 pipe cleaners
  • 2 drinking straws
  • 2 bamboo skewers
  • 7 tongue depressors
  • 2 disposable spoons
  • Paper -- one sheet copy paper, 1 3x5 index card, 1 4x6 index card
  • 2 pieces of cardboard
  • Tape -- masking and invisible
  • 10 assorted rubber bands
  • 1 pair of scissors
All items were packed into a plastic Ziploc-style bag. Students were only allowed to use the items they were given, nothing else. Everyone had to work in a team to transport as many mini marshmallows as possible across the floor over a distance of 10 feet without aiding their contraption after "launch." Are you up to the challenge?

If you want to make it even tougher,  try for 15 or 20 feet. Or try to send multiple pieces of food,  large pieces of food or really heavy food.

We'll be back next week with another Super Secret Science Challenge. You can take the challenge at Kaleidoscope, or bring it to your school or club!

Like this? Help support this and other fun programs with your donation.


Thursday, September 26, 2013

Making Myth Busters

As a self-respecting nerd, I have a fondness for Mythbusters. This Emmy-winning show -- featuring special effects experts/mad scientists Adam Savage and Jamie Hyneman – seeks to bust or confirm urban legends and popular myths using a positively gleeful approach to the scientific method. Mayhem often ensues. Failure is an option. Their tagline is “Don’t try this at home.” You get the idea.


That’s why I was so thrilled when my students started watching the show and asked to replicate some of their wild experiments in class. Yup. That’s pure Maker gold right there, and totally educational too. Even better, my mad Google skills revealed that there are official lesson plans available online for free, offered by the fine folks of Discovery’s MythBusters: The Explosive Exhibition traveling museum event. Sweet!

So I clicked on the “Educator” tab and looked at the experiments provided. First up, the “Airplane on a Conveyer Belt” episode – one of the most controversial and awesome myths explored on the show and perfect fodder for a discussion of Newton’s First and Third Laws of Motion. The idea is simple: If you put a moving airplane on a conveyor belt moving at the same speed in the opposite direction, will it be able to take off?


The experiment offered in the lesson plan: a balloon zipping down a string. It just about broke my nerd-girl heart.

Don’t get me wrong. I love balloon on a string. It’s super fun. But when presented for education, it is also boring, boring, boring! As in the “Airspeed” lesson plan, step-by-step instructions are given. Attach a piece of drinking straw to a balloon, tie a piece of fishing line to a chair, thread the line through the straw, blow up balloon and launch. That folks is a procedure, not an experiment.
You can ask all the leading questions you want, but the fact is, the kids know what’s going to happen. And though they may not know the exact jargon, they get why it works. Not a huge mystery here. Not really myth busting. Where are the planes? Where’s the conveyer belt? What went wrong between awesome, action-packed T.V. show and mundane, run-of-the-mill science class?

I did a different experiment with my students. I pulled out the LEGOs and the balloons. Students were tasked with making a freestanding vehicle that could be powered by the propulsion of the balloon. That’s some serious design work right there. You need to consider the mass of the vehicle, the wheel base, how to attach the balloon, how to achieve maximum thrust and more.  We took the time to prototype, test and optimize our cars using a design cycle and shared our ideas. (Those that need a nudge can take inspiration from 2013’s Maker Camp “Rocket-Propelled Toy Car” Week 1 project.)


Once students had their vehicles built we used wax paper as make-shift conveyer belts, pulling the paper in the direction opposite of the car, just as Adam and Jamie used paper and cloth in the Mythbusters episode. We experienced many of the same frustrations, trying to keep the moving car on the paper, accidentally stepping on and ripping the belt, etc. Just like in the episode! It was difficult, and frustrating and challenging. Just like real science and engineering!


In the end we only got a couple of good runs, but that’s ok. The whole class shared in the triumph together. We also busted the myth. Bonus! This of course led to great discussion about why it worked and plans to test the same concept with motorized cars instead.

So thank you Mythbusters. You guys rock! And my advice for teachers? Skip the boring procedural experiments and make some mayhem instead. You’ll be glad you did.


Friday, September 20, 2013

Maker Faire Education Day

On Thursday, September 19, I headed up to Queens and the New York Science Museum for Maker Faire's Educator Day. 11 schools, with students ranging from elementary to high school. They cycled through 6 areas of exhibits put together by Makers who are attending the 2013 Makers Faire.


Kaleidoscope was there with mini marshmallow catapults, a constant favorite. I expected the younger kids to get a kick out of the project, but even the "to cool for school" teens had fun as well. It was funny to see kids that you know would yawn at the idea of physics lab in class get so curious and passionate about launching a marshmallow into a box. They didn't just build the catapult -- they prototyped and tested and optimized. As a result we had some great discussions about angular momentum, thrust, forces and kinetic energy. We also ate a lot of marshmallows and told stupid jokes.

Several of the teachers jumped in too, and we chatted about how to include catapults into their curriculum. Luckily I was ready with a lesson plan.

That's the power of the Maker Movement. It's about fun and curiosity, not books and lab reports. It's a special kind of magic, and I loved being able to be part of it yesterday. (Even if it did mean getting a really awful picture of myself on Makezine!)

Read more...


Making Education Work

A short piece I wrote for Makezine was publish a few days ago. It's all about the Maker Movement and Education.

"Well, imagine shop class and recess had a love child – that’s the maker movement, and many folks are betting that it can fix what’s broken in our schools."

Tuesday, August 6, 2013

Welcome to the 21st Century

A while back, I was a member of an Educator’s Book Club at school. At the time we were exploring so-called 21st Century Skills – the skill sets our students would need for the shifting future of tomorrow’s job market. These abilities, as set forth by the Partnership for 21st Century Skills, include creativity, innovation, communication and problem solving as well as the core subjects. But they also include information and media literacy, financial literacy and global awareness as important themes that students need to explore. 


Since several of us were also science and math teachers, it was natural to explore the connections between those sought-after skills and the current trends in STEM (Science, Technology, Engineering and Math) education.

The year 1991 marked an important turning point in the American work force. For the first time money spent on Knowledge Age goods – information and communication technologies – exceeded Industrial Age good – materials for agriculture, mining, manufacturing, etc. That $5 billion difference marked a shift in the U.S. economy from a world that was all nuts-and-bolts to one that was information-driven. The world had become high-tech, almost overnight.

The problem is that not much really changed in K-12 education to echo that tremendous shift. Sure there are more computer labs, and kids know how to use PowerPoint, but is that really any different than typewriters and shorthand classes of long ago? Has the thinking really changed, or have we simply updated the tools?

Elementary age students of today will face a completely different job market in their adult lives than the one our educational system is currently designed to support. They will be knowledge workers relying on digital tools, creativity and an ability to work collaboratively with people from all over the world. Out-of-the-box thinking will need to be their norm. They will change careers and companies many times over the course of their adult lives, which requires flexibility and adaptability, not to mention the ability to transplant what they have learned in one industry into a completely different one, with new rules and expectations.

That’s a perfect match to goals of good STEM education, where an innovative technological workforce is the primary goal. Critical thinking, creativity, and collaboration have long been sought after, especially in the sciences and in engineering. Now, however, the importance of such skills has become deeper and more urgent as we watch the world change more quickly than our textbooks can keep up with. The kind of thinking needed for solid science and engineering will be the kind of thought needed for many, many other disciplines, as well.

We can – and must -- create a system that supports the new world we’re already building. And that’s something that can’t come from the top down, with bureaucracy and administration. It can’t come through standard tests and budget cuts. It needs to grow from the ground up. We need to be the change – parents, students, educators. We need to embody the new world and passionately share it with others.

The future is already here. What are you going to do about?

Monday, August 5, 2013

Book Review: Mini Weapons of Mass Destruction

Despite its seemingly violent title, Mini Weapons of Mass Destruction: Build Implements of Spitball Warfare by John Austin has become one of my go-to books when I'm looking for a fun, easy project that doesn't require a fortune in supplies. Though the target audience for the book is clearly bored cubicle slaves, I've found that a lot of the projects make for great engineering builds and excellent physics experiments.


One of my personal favorites, which I build literally hundreds of times, is the tongue depressor catapult. This little beauty takes just minutes to make and costs pennies. But every kid has a blast with it. I've made my own adjustments, of course. Instead of gluing on a soda cap to make a bucket for ammunition, I just attach a disposable spoon. And rather than launching erasers, I love to shoot marshmallows. Now that tongue depressors come in so many fun colors, the projects are even more fun!


The book also has fun designs for other catapults and trebuchets, many based on historical reproductions. I've used it in class to explore how designs have change through time, as materials and technology have changed. Have students research each design then build their mini-weapon is a great integrated study, which doesn't cost a fortune.

Not every design is perfect; I've had some that took quite a bit of tweaking to work.However, for the shear number of designs and the creative play possibilities, this is one of my favorite books. In addition, the instructions are generally well-written, with clear black and white line-art diagrams of each step. That makes it something that many kids can explore on their own, building as they go.

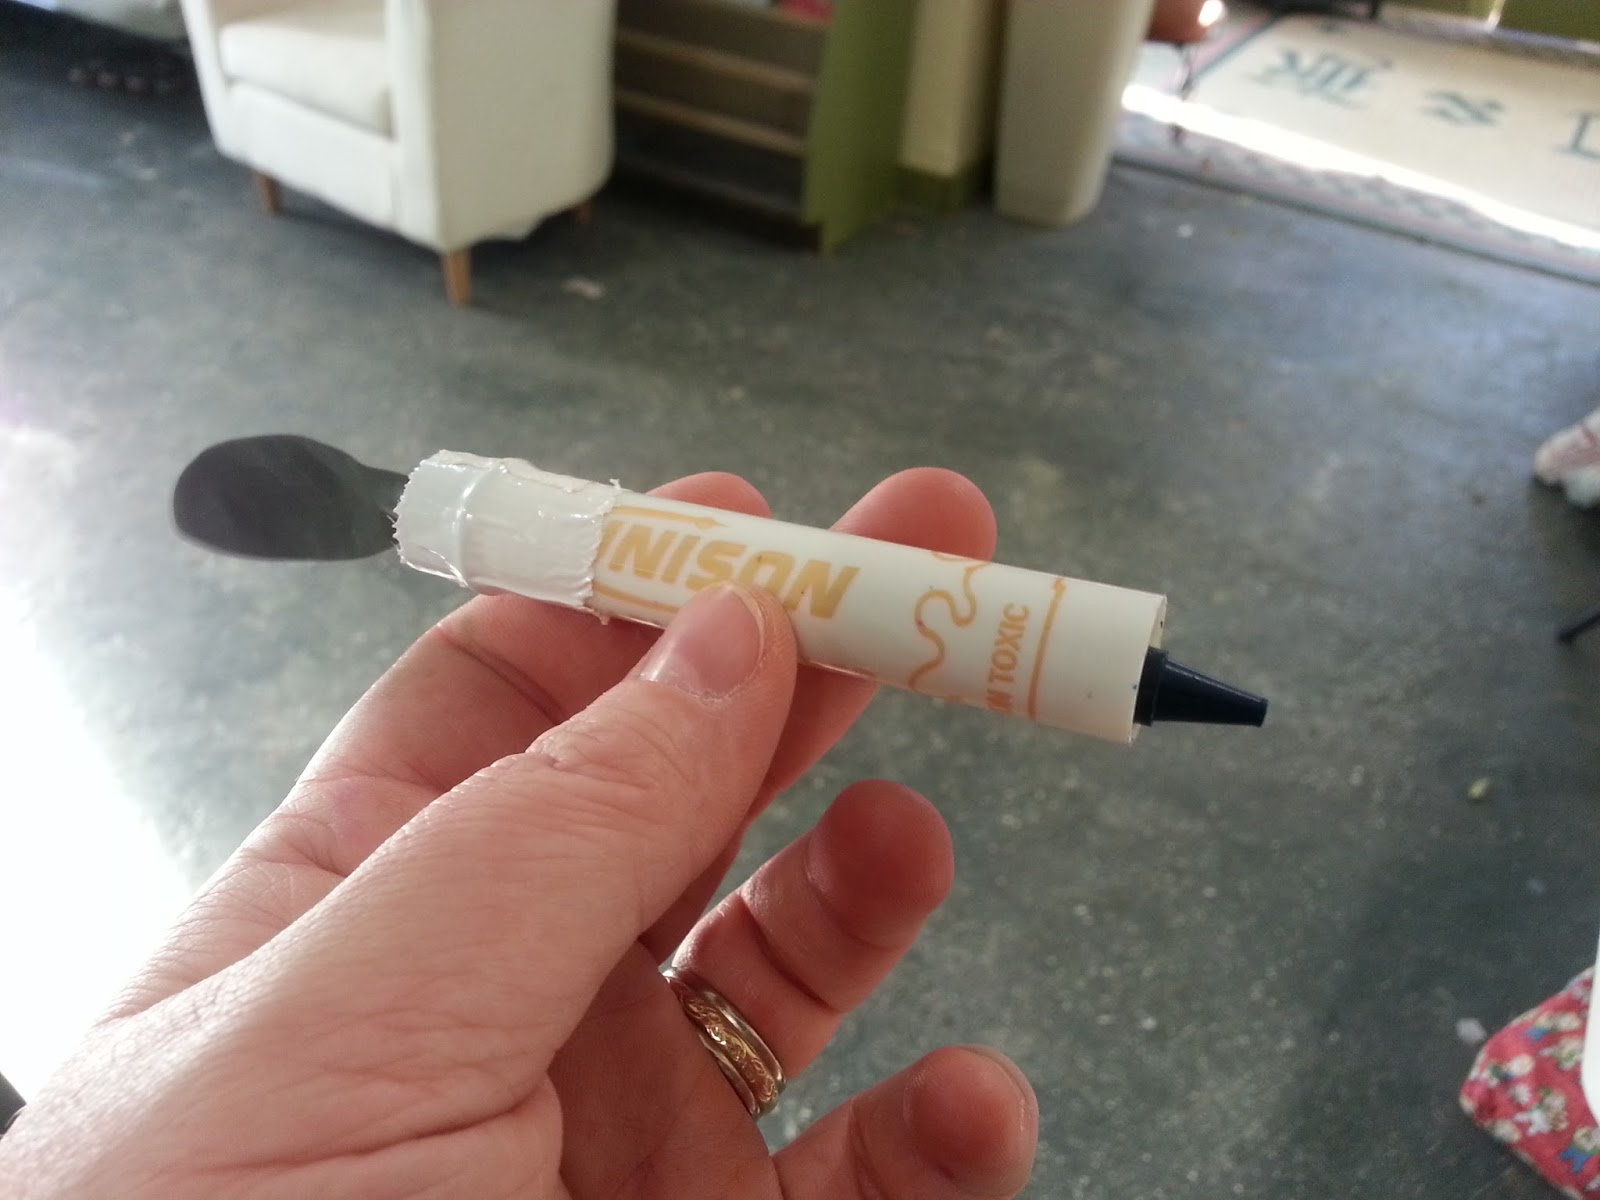
The book has a companion, written by the same author: Mini Weapons of Mass Destruction 2: Build a Secret Agent Arsenal. Once again, the designs are well-written and clearly illustrated and the content encourages a strong DIY vibe. I have made the oragami-style shooting star many times in many settings. And the recycled marker converted to a crayon launcher is pure genius. This book always gives me ideas for my spy classes and parties.


As I was writing this book review, I found that the author is at it again! He's published a third installment: Mini Weapons of Mass Destruction 3: Build Siege Weapons of the Dark Ages. I have, of course, ordered it. I'll let you know what my favorite projects are, just as soon as it arrives!

Saturday, July 13, 2013

The 2-liter bottle boat

Maker Camp officially kicked off on Monday, July 8 and the first project on tap was a boat built from a two-liter bottle with a paddle made of plastic lids. It completely captured Gwen's attention, and we had a lot of fun with the build!

The concept is simple: Use empty soda bottles to create the buoyant body of the boat, then add paddles powered by energy stored in the tension of twisted rubber bands to make the boat move. Throw in the use of colorful duct tape, and you pretty much have a perfect project for a summer day!

We started by attaching two bamboo skewers to the sides of our washed bottle. Later we switched to stronger dowels, because the skewers tended to bend too much under the stress of the rubber bands.


Then you measure between the dowels and create your two paddles. They need to have a length that is 1 inch wider than the distance measured and a width that is 1 inch shorter, creating a rectangle. We cut ours from the top of an old Rubbermaid-style container. Once cut, you create a slit in the middle of each and join them into a cross shape (+). We found it helped to secure the paddles in place with duct tape.


Next you attach two 1-liter bottles to either side of the larger bottle. We positioned ours just below the dowels with the backs just about even with the 2-liter. Placing them any further back interfered with the movement of our paddles. As we continued to trouble shoot the project, we found that when attaching the dowels and small bottles, it was important to pay close attention the shape of the larger bottle. If you apply tape across an inward curve, it will pull everything out of whack and the paddles will jam.

The last step is to attach the rubber bands so that they hold the paddles in place between the two dowels. We found we needed to trim our paddles a bit more, to be sure they had enough clearance to move. Gwen wanted to trim them a lot and we talked about why that may not be the best idea, since the amount of surface area directly affects the force created, thanks to the resistance of the water against that big flat surface. We also found that the length and width of the rubber bands mattered, though not nearly as much as we expected. In the end we opted for "medium" thickness bands that were just barely tight across the dowels before twisting.


To use the boat you twist the paddles, transferring the kinetic energy from your hands to the paddle to the bands and creating tension across the rubber bands. Of course you've now stored potential energy in the bands until you release then and the paddle rotates and propels your boat! Super simple and lots of fun. It was a big hit at the pool, where everyone wanted to know what Gwen had built and see it work.


One of the most fun things was discovering that the direction in which you turn the paddles matters when you release! Turn them one way, the boat moves forward. Turn the other, and back it goes. Spending some time observing both and discussing why it happens was great.

Of course the first hing Big Sister Caitie wanted to do was sink the boat and see if it works as a sub. I guess we'll try that at the pool tomorrow! We also want to experiment with the shape of the bottles to see how they affect the movement of the boat. Would a one gallon milk jug work as well? I guess we'll have to find out!