My most recent post for Makezine. I really want to get my hands on these!
Stanford bioengineering professor Manu Prakash, PhD is on a mission. He wants to make it easy for field researchers to identify and diagnose dangerous microbial diseases like malaria, African sleeping sickness, schistosomiasis, Chagas and more.
To do that, he and his team have created the Foldscope — an inexpensive, disposable paper microscope that uses tiny spherical lenses. In addition to a low price point of 50 cents, the Foldscope is remarkably durable, waterproof and adaptable, weighs just under 9 grams, can be built in minutes, requires no external power and, since it travels as a flat, printed sheet, takes up very little space. It has the potential to be a game-changing tool in the world of medicine and microscopy.
Can you design two sleds -- one fast and one slow -- to deliver our Secret Agents to the lair of the evil Mr. Fluffly? You'll need to balance the effects of gravity and friction to make your design work. Join in the engineering fun with this installment of the Super Secret Science Challenge!
This week's suggested supplies:
2 cardboard or plastic trays
2 drinking straws
2 bamboo skewers
2 pencil
2 pipe cleaners
4 binder clips
4 paperclips
1 piece of copy paper
1 piece of wax paper
1 piece of plastic sheeting
1 piece of cotton fabric
4 old AA or AAA batteries
Assorted tapes -- invisible, masking, duct, packing, etc.
A small toy to act as the pilot
A wood plank, plastic rain gutter, or other material to act as the track
For this week's challenge, students will need to play with the balance between the force of gravity (and weight) on the sled and the friction between the sled and the track. The position of the pilot and any ballast (like the batteries or binder clips) can make for a great discussion about the center of gravity.
Meanwhile, the decision between using a flat bottomed design, versus one with runners leads to an excellent discussion about how friction works. (The more contact, the more friction.) Additionally, the materials selected for the bottom of the sled (or even for a parachute behind it) can greatly affect how fast the sled moves on the track.
You can use anything you want as a track, but make sure the starting point and end point are clearly defined. The angle of the track will greatly affect the way the sleds run, as will any curves or bends. This can be fun for experimentation.
This week we have new heroes on our side: The B Team. They need to parachute into enemy territory and bug Mr. Fluffy's Lair! Are you the right Science Officer for the challenge? Let's find out, with this week's Super Secret Science Challenge!
Today's list of suggested supplies are:
1 yard of string
1 plastic shopping bag
1 sheet of newspaper
3 sheets of copy paper
1 lunch bag
5 coffee filters
1 8.5x11” piece of aluminum foil
A small paper cup
8 paper clips, assorted
1 pipe cleaner
Various tapes -- invisible, masking, duct, etc.
A small toy as the pilot
To make this challenge even more fun, give your scientist two goals: create a parachute with the longest hang time possible and try to land right on a target. I drop my parachutes from a height of 2 meters (roughly the height of a door frame) with the feet of the "B Team" member as the bottom of the unit. Encourage students to create more than a single parachute for the challenge, as it can be tough to meet both objectives with one or, allow students to move the target to where they predict the parachute will land.
A parachute is a fairly simple creation. It's primarily composed of a canopy made of some type of material, which creates lift (and drag) through the frictional force of air resistance. The parachute is connected to the pilot, who is held in a harness, by lines that connect to the canopy. The pilot is pulled by gravity towards the ground.
Good luck Agents! Hope you have fun making your creations!
Leif Ristroph and Stephen Childress from New York University have just released work with a new robotic ornithopter with a biomechanical design based not on traditional insects or birds, but rather on the aquatic jellyfish. As a result the researchers say they’ve solved stability problems that have plagued other machines. Read more...
It took five years, a lot of manilla folders and glue, and tremendous patience, but designer Luca Iaconi-Stewart finally completed his 1:60-scale replica of a 777 jetliner. The model, complete with miniature seats, engine, doors and even retractable landing gear, is almost as complicated as the real thing. Read more...
This week, field agents Misty, Sunshine and The Weather Weasel have been captured by the evil Mr. Fluffy. They need to build a super complicated, crazy contraption to distract the villain before he can use his Puppinator to change all of the world's dogs into cats!
This week's materials are:
6-4x6 and 2-3x5 Index cards
3 dixie cups
4 bamboo skewers
assorted cardboard (corrugated and chipboard)
6 feet of twine
10 paper clips
10 assorted rubber bands
2 marbles
1 ping pong ball
3 toilet paper tubes
1 balloon
4 drinking straws
4 pipe cleaners
2 clothes pins
10 tongue depressors
1 disposable spoon
masking tape and scotch tape
This week's challenge encourages students to build a Rube Goldberg Machines. These contraptions are designed to make simple tasks much more complicated, often with silly results. Aside from being tremendously creative projects that are a lot of fun to build, Rube Goldberg Machines also give students the opportunity to explore simple machines.
Simple machines -- such as inclined planes, levers, wheels and axles, pulleys, wedges and screws -- are mechanical tools that make work easier by changing the direction or amount of force used to complete a task. We use simple machines every day, and when we combine them, we can create complex machines. Challenge older students to identify examples of simple machines within their crazy contraption.
Have fun! And please, don't hesitate to share your pictures of your machines!
Field Agent Misty must rush to save her partner, Special Agent Sunshine, from the forces of evil! You need to build her a car that can move quickly, quietly and without much steering. (Misty has tiny, little hands. After all, she's a rat.)
This week's materials are:
2 pieces of cardboard (make sure at least one piece is corrugated)
4 CDs
2 bamboo skewers
2 drinking straws
1 pipe cleaner
2 paper clips
6 various rubber bands
1 clothespin
1 binder clip
1 roll of masking tape
I also included 4 wooden hobby wheels and 4 pieces of wagon wheel pasta. I encourage you to look around and find other "wheels" to use -- try old tools, bottle caps, etc.
The challenge here is to build a car from the materials. The facilitator should set a track of 10 feet for students to run the cars. The goal for younger children may only be to create a car that can run straight for that distance. It's not as easy as it sounds! Older students should be encouraged to use the rubber bands to propel the car. This is more challenging.
In all cases, students should use the experience to develop an understanding of how the wheel and axle works. The wheel and axle is one of the simple machines, allowing vehicles to move with less friction. The size of the wheel in relationship to the axle affects the amount of work done by the machine. Encourage students to explore these ideas.
To propel the car, attach a rubber band to the front axle, then pull it to the back of the car and secure it. Wind the axle, release it, and the energy you built up in the rubber band will be released to turn the axle. It can take a few tries to get it right, but once you do, there are endless variations.
Several examples are presented in the video, and I wanted to share them here as well, so that you can take a good look if you like.
This is a great super secret science challenge all about bridges. Try your hand at structural engineering and have a lot of fun too! Help The Weather Weasel cross between two buildings using only gumdrops, marshmallows and toothpicks as supplies!
Materials List (for each group):
1 bag of spice drops
1 cup of mini marshmallows
1 box of round toothpicks (250 count)
For the challenge, students must build a 2-foot long bridge that is at least the height of a toothpick that can hold a 3 pound weight placed in the center of the bridge. Once they have accomplished that, they must raise the bridge off the table or desk and have it suspended over air for a span of six inches. The height the bridge is raised can vary, but using two identical textbooks on either side of the bridge is practical.
Be aware that spice drops and gum drops, while generally allergen free, are often processed in facilities that handle nuts, dairy, wheat and soy, so allergies can be an issue. My sensitive students were able to wear gloves to protect their skin. For alternatives and allergen free options, check out this list at Sure Foods Living.
For the super accurate scientific model of The Weather Weasel, I filled a white men's tube sock with rice until it weighed 3 pounds (the approximate weight of my ferret). This weigh presents a fun challenge, not just because of the weight, but because it's floppy and molds itself to the bridge. It also requires a wider bridge than students might normally choose to make when they are focused on the length of the bridge. This is good, because a wider bridge is more stable. If you don't have a super accurate scientific model available, try stacking books on the bridge instead.
With younger students, have them focus first building a sturdy structure directly on a flat surface. They may not get past that point, and that's just fine. Have them focus in on the shapes they use: triangle versus square, pyramid versus cube. Encourage students to "prototype" a small span of bridge before committing to a larger length.
And just in case you hear, "That's impossible!," let me assure you it is not. Here are some awesome pictures of past creations!
Want to learn more about bridges? Check out "Building Big" by PBS.
As part of our homeschool Cooperative for Science and Math, we've been exploring the experiments featured on the Mythbusters show. Last week, we decided to test one of my absolute favorite myths: "Toast will always fall buttered side down."
There are few ways to look at this. The first is as a coin toss. Flip a coin and you should have about the same odds for a tails up as for a heads. This is basic probability. You can test it yourself. Actually I highly recommend that you do! (Mythbusters: The Explosive Exhibition has a lesson plan, called "Flip It," all about it.)
Get some friends together, as we did in class, and collect as much data as you can. Aim for 100 coin tosses, making a simple tally sheet to record which flips come out heads or tails. Then you can compare the ratio of heads to tails, create a bar graph, even determine the percentage error!
Now that you know what the data looks like if both sides of the coin -- or toast, in this case -- are equal, what happens if you make the sides unequal.
There are a lot of questions you could ask, as you design your experiment. You want to make sure you know your variables and control for as much as possible. Some questions we had:
Do the pieces of toast need to be the same shape? Can we control for the the shape of the toast? How?
Does the mass of each piece of toast matter? How can we control for the mass?
Does the amount of toasting affect how the toast falls? Do they need to be equally browned on both sides?
Does the amount of butter on each piece need to be the same? How can we control the amount of butter on each piece? Does it matter how we apply the butter? Can we use something other than butter -- such as vegetable shortening, peanut butter or jelly?
Does the height from which the toast is dropped make a difference? Does it matter how the toast is held when it is dropped? Does it matter if the same person does the drop each time?
What would happen if we spread butter on both sides of the bread? Or none?
How many pieces of toast should we drop before we can feel sure about our results?
The toast myth gives a lot of room for experimental design. Make sure you let the kids take the time to decide what questions are most important to them.
We decided to use 1 tsp. of vegetable shortening (easy to measure) on one side of toast, dropped from the height of a step ladder by an adult, with the toast held vertically before the drop. We further tested the affect of the shape of the toast on the fall -- half of the toast was selected for similarity by sight; the other half was cut to a uniform circle using a cutter. We dropped 8 pieces of toast for each shape.
In the end, our results were very much the same as the Mythbusters results from the show! We didn't get exactly even results. In fact we found toast was more likely to fall with the buttered side up. There are some really interesting reasons for this: period of rotation, moment of inertia and angular momentum all play a role.
Given enough time to explore, how many variables can you control? Well, we only had an hour, but this could easily be a whole day project. (And time well spent.)
So next time you're having breakfast, maybe you can have some science with your coffee and tea. Enjoy!
This week we had our first Super Secret Science Challenge this week, at the Kaleidoscope Learning Center and at Belvidere Elementary School. Want to play along at home? Check out the video below!
Here are the supplies our Science Officers were given:
3 cups -- one each styrofoam, plastic and paper
Various string -- 3 feet of twine and 9 feet of fishing line
1 9" latex balloon
2 pipe cleaners
2 drinking straws
2 bamboo skewers
7 tongue depressors
2 disposable spoons
Paper -- one sheet copy paper, 1 3x5 index card, 1 4x6 index card
2 pieces of cardboard
Tape -- masking and invisible
10 assorted rubber bands
1 pair of scissors
All items were packed into a plastic Ziploc-style bag. Students were only allowed to use the items they were given, nothing else. Everyone had to work in a team to transport as many mini marshmallows as possible across the floor over a distance of 10 feet without aiding their contraption after "launch." Are you up to the challenge?
If you want to make it even tougher, try for 15 or 20 feet. Or try to send multiple pieces of food, large pieces of food or really heavy food.
As a self-respecting nerd, I have a fondness for Mythbusters. This Emmy-winning show -- featuring special effects experts/mad scientists Adam Savage and Jamie Hyneman – seeks to bust or confirm urban legends and popular myths using a positively gleeful approach to the scientific method. Mayhem often ensues. Failure is an option. Their tagline is “Don’t try this at home.” You get the idea.
That’s why I was so thrilled when my students started watching the show and asked to replicate some of their wild experiments in class. Yup. That’s pure Maker gold right there, and totally educational too. Even better, my mad Google skills revealed that there are official lesson plans available online for free, offered by the fine folks of Discovery’s MythBusters: The Explosive Exhibition traveling museum event. Sweet!
So I clicked on the “Educator” tab and looked at the experiments provided. First up, the “Airplane on a Conveyer Belt” episode – one of the most controversial and awesome myths explored on the show and perfect fodder for a discussion of Newton’s First and Third Laws of Motion. The idea is simple: If you put a moving airplane on a conveyor belt moving at the same speed in the opposite direction, will it be able to take off?
The experiment offered in the lesson plan: a balloon zipping down a string. It just about broke my nerd-girl heart.
Don’t get me wrong. I love balloon on a string. It’s super fun. But when presented for education, it is also boring, boring, boring! As in the “Airspeed” lesson plan, step-by-step instructions are given. Attach a piece of drinking straw to a balloon, tie a piece of fishing line to a chair, thread the line through the straw, blow up balloon and launch. That folks is a procedure, not an experiment.
You can ask all the leading questions you want, but the fact is, the kids know what’s going to happen. And though they may not know the exact jargon, they get why it works. Not a huge mystery here. Not really myth busting. Where are the planes? Where’s the conveyer belt? What went wrong between awesome, action-packed T.V. show and mundane, run-of-the-mill science class?
I did a different experiment with my students. I pulled out the LEGOs and the balloons. Students were tasked with making a freestanding vehicle that could be powered by the propulsion of the balloon. That’s some serious design work right there. You need to consider the mass of the vehicle, the wheel base, how to attach the balloon, how to achieve maximum thrust and more. We took the time to prototype, test and optimize our cars using a design cycle and shared our ideas. (Those that need a nudge can take inspiration from 2013’s Maker Camp “Rocket-Propelled Toy Car” Week 1 project.)
Once students had their vehicles built we used wax paper as make-shift conveyer belts, pulling the paper in the direction opposite of the car, just as Adam and Jamie used paper and cloth in the Mythbusters episode. We experienced many of the same frustrations, trying to keep the moving car on the paper, accidentally stepping on and ripping the belt, etc. Just like in the episode! It was difficult, and frustrating and challenging. Just like real science and engineering!
In the end we only got a couple of good runs, but that’s ok. The whole class shared in the triumph together. We also busted the myth. Bonus! This of course led to great discussion about why it worked and plans to test the same concept with motorized cars instead.
So thank you Mythbusters. You guys rock! And my advice for teachers? Skip the boring procedural experiments and make some mayhem instead. You’ll be glad you did.
KLC had the privaledge of attending World Maker Faire 2013 in New York this year, with our own table and a fun marshmallow launcher for the kids to make! It was an exhausting, amazing weekend -- for me, my husband, Steve, and for my daughters, Caitie and Gwen. Maker Faire is a complete creative explosion. Even with four days to explore, I still wanted more time to check out all the wonderful projects!
That's me, ready to go early on Saturday morning. Folks started lining up long before the gates opened at 10 am!
As a I mentioned previously, we attended Maker Faire Education Day on Thursday, then we were back out to Queens on Friday afternoon for our official set up and dinner.
Dale Dougherty, editor and publisher of MAKE, hands out paella to all the makers on Friday night. Thanks for the dinner Dale! It was great!
Gwen, ready to go and marshmallows loaded.
Our friend Linda stopped by both days to help us out, thankfully. We made A LOT of marshmallow catapults with kids and adults!
So we all had fun and launched hundreds (thousands?) of marshmallows all over the Zone E. But what other booths were awesome? Well, glad you asked...
I have to start by giving a shout out to our friends at Let's Make Robots. These guys are doing great work helping everyone in the world learn to build and program their own bots. And they're fun to grab a beer with as well. Chris Robinson, of Rocket Brand Studios, talked himself horse both days, explaining some of the great projects created by LMR members. (BTW, we highly recommend Rocket Brand's robots and use the Tadpole in our robotics classes at KLC.)
I also want to give props to some young makers from KLC's neck of the woods. The guys with The 721st MCB, an Amateur Radio Club from Warren County NJ who brought their amazing E-APS Emergency Antenna Platform System to share with the world. This lightweight open source portable tool helps Amateur Radio Operators deploy HF and VHF/UHF antennas high in the field using standard parking lot light / flag poles. Great work!
Now, as some of you know, I love soft circuits, e-textiles and wearable electronics. So I was super exciting to see and meet Becky Stern on Friday night! She was even wearing her Firewalker shoes! I loved the work of bitwise, Blockuits, and Make Anything. All had prejects just right for young makers!
Other favorites included the fantastic fractals at Fractal Kit, the cool recycled boats made with the ScrapKins folks, the great bicycle powered blender by Frankenbike and Friends, the amazing arduino controlled RC toy car by RoboTech, (need to get that one for a KLC class) and the novel approach to working with DNA from Gemonikon.
I could go on and on, but I won't. There was simply too much awesome to put it all in a blog post. But if you want to take a look for yourself, the hardworking editors at MAKE have been posting like mad.
KLC was awarded an Editor's Choice award! How cool!
A while back, I was a member of an Educator’s Book Club at school. At the time we were exploring so-called 21st Century Skills – the skill sets our students would need for the shifting future of tomorrow’s job market. These abilities, as set forth by the Partnership for 21st Century Skills, include creativity, innovation, communication and problem solving as well as the core subjects. But they also include information and media literacy, financial literacy and global awareness as important themes that students need to explore.
Since several of us were also science and math teachers, it was natural to explore the connections between those sought-after skills and the current trends in STEM (Science, Technology, Engineering and Math) education.
The year 1991 marked an important turning point in the American work force. For the first time money spent on Knowledge Age goods – information and communication technologies – exceeded Industrial Age good – materials for agriculture, mining, manufacturing, etc. That $5 billion difference marked a shift in the U.S. economy from a world that was all nuts-and-bolts to one that was information-driven. The world had become high-tech, almost overnight.
The problem is that not much really changed in K-12 education to echo that tremendous shift. Sure there are more computer labs, and kids know how to use PowerPoint, but is that really any different than typewriters and shorthand classes of long ago? Has the thinking really changed, or have we simply updated the tools?
Elementary age students of today will face a completely different job market in their adult lives than the one our educational system is currently designed to support. They will be knowledge workers relying on digital tools, creativity and an ability to work collaboratively with people from all over the world. Out-of-the-box thinking will need to be their norm. They will change careers and companies many times over the course of their adult lives, which requires flexibility and adaptability, not to mention the ability to transplant what they have learned in one industry into a completely different one, with new rules and expectations.
That’s a perfect match to goals of good STEM education, where an innovative technological workforce is the primary goal. Critical thinking, creativity, and collaboration have long been sought after, especially in the sciences and in engineering. Now, however, the importance of such skills has become deeper and more urgent as we watch the world change more quickly than our textbooks can keep up with. The kind of thinking needed for solid science and engineering will be the kind of thought needed for many, many other disciplines, as well.
We can – and must -- create a system that supports the new world we’re already building. And that’s something that can’t come from the top down, with bureaucracy and administration. It can’t come through standard tests and budget cuts. It needs to grow from the ground up. We need to be the change – parents, students, educators. We need to embody the new world and passionately share it with others.
The future is already here. What are you going to do about?
This week's Science and Swim was a really fun project that explores buoyancy. We made submarines using recycled water bottles. When placed in water, the bottle fills with water, pulling it down below the surface, then, by blowing air though an attached straw, the water is forced out and the submarine rises again.
One of the things I love about this project is that is clearly demonstrates that both water and air take up space -- they have volume and can be displaced. Too often kids think of air as "nothing," or as "empty." This shows that to be untrue.
Also, it displays the importance of density: the bottle can be filled with water or air, but only with the denser water does it sink. You're filling the same exact space, but one is much heavier (i.e. it has more mass), and it is therefore a denser material.
All that said, let's get to the build! You'll need the following materials: a disposable water bottle, a drinking straw with a flexible neck, waterproof tape (I like duct tape), pennies or washers, rubber bands and scissors.
Start by using the scissors to place three small holes in the bottle along one side -- by the neck, in the middle and near the base. These will let the water in the submarine.
Next attach the straw. Place the end with the flexible bit into the neck of the bottle and secure with tape. Be sure that the straw is attached to the topside of the bottle, opposite the holes. Also be sure that the piece inside the bottle is aimed up, to allow the maximum amount of air to escape as the bottle fills with water. Bend the long part of the straw up, so that is can be used to add air. Use tape to completely seal the opening of the bottle.
To create ballast, make a stack of pennies and wrap them in duct tape. I'd suggest starting with three stacks of six pennies and adjusting as needed. Use rubber bands to secure the pennies to the underside of the submarine.
This is a great area of experimentation and exploration. How many pennies are need to get your submarine to fully submerge? Is it even possible to get the submarine to fully submerge? Does it matter where you attach the pennies along the body? Do you need to place an equal number of pennies in each stack? What happens if you don't?
To test the craft, place it in water, the underside down and let it slowly fill with water. Once it no longer sinks, blow air through the straw and it will rise again. You can even let it sink the bottom of the pool, dive in and "rescue" it from the depths.
Once you're happy with the number and placement of the pennies, dry off the submarine and tape the stacks of pennies on. It'll be easier to play with. Have fun!
Despite its seemingly violent title, Mini Weapons of Mass Destruction: Build Implements of Spitball Warfare by John Austin has become one of my go-to books when I'm looking for a fun, easy project that doesn't require a fortune in supplies. Though the target audience for the book is clearly bored cubicle slaves, I've found that a lot of the projects make for great engineering builds and excellent physics experiments.
One of my personal favorites, which I build literally hundreds of times, is the tongue depressor catapult. This little beauty takes just minutes to make and costs pennies. But every kid has a blast with it. I've made my own adjustments, of course. Instead of gluing on a soda cap to make a bucket for ammunition, I just attach a disposable spoon. And rather than launching erasers, I love to shoot marshmallows. Now that tongue depressors come in so many fun colors, the projects are even more fun!
The book also has fun designs for other catapults and trebuchets, many based on historical reproductions. I've used it in class to explore how designs have change through time, as materials and technology have changed. Have students research each design then build their mini-weapon is a great integrated study, which doesn't cost a fortune.
Not every design is perfect; I've had some that took quite a bit of tweaking to work.However, for the shear number of designs and the creative play possibilities, this is one of my favorite books. In addition, the instructions are generally well-written, with clear black and white line-art diagrams of each step. That makes it something that many kids can explore on their own, building as they go.
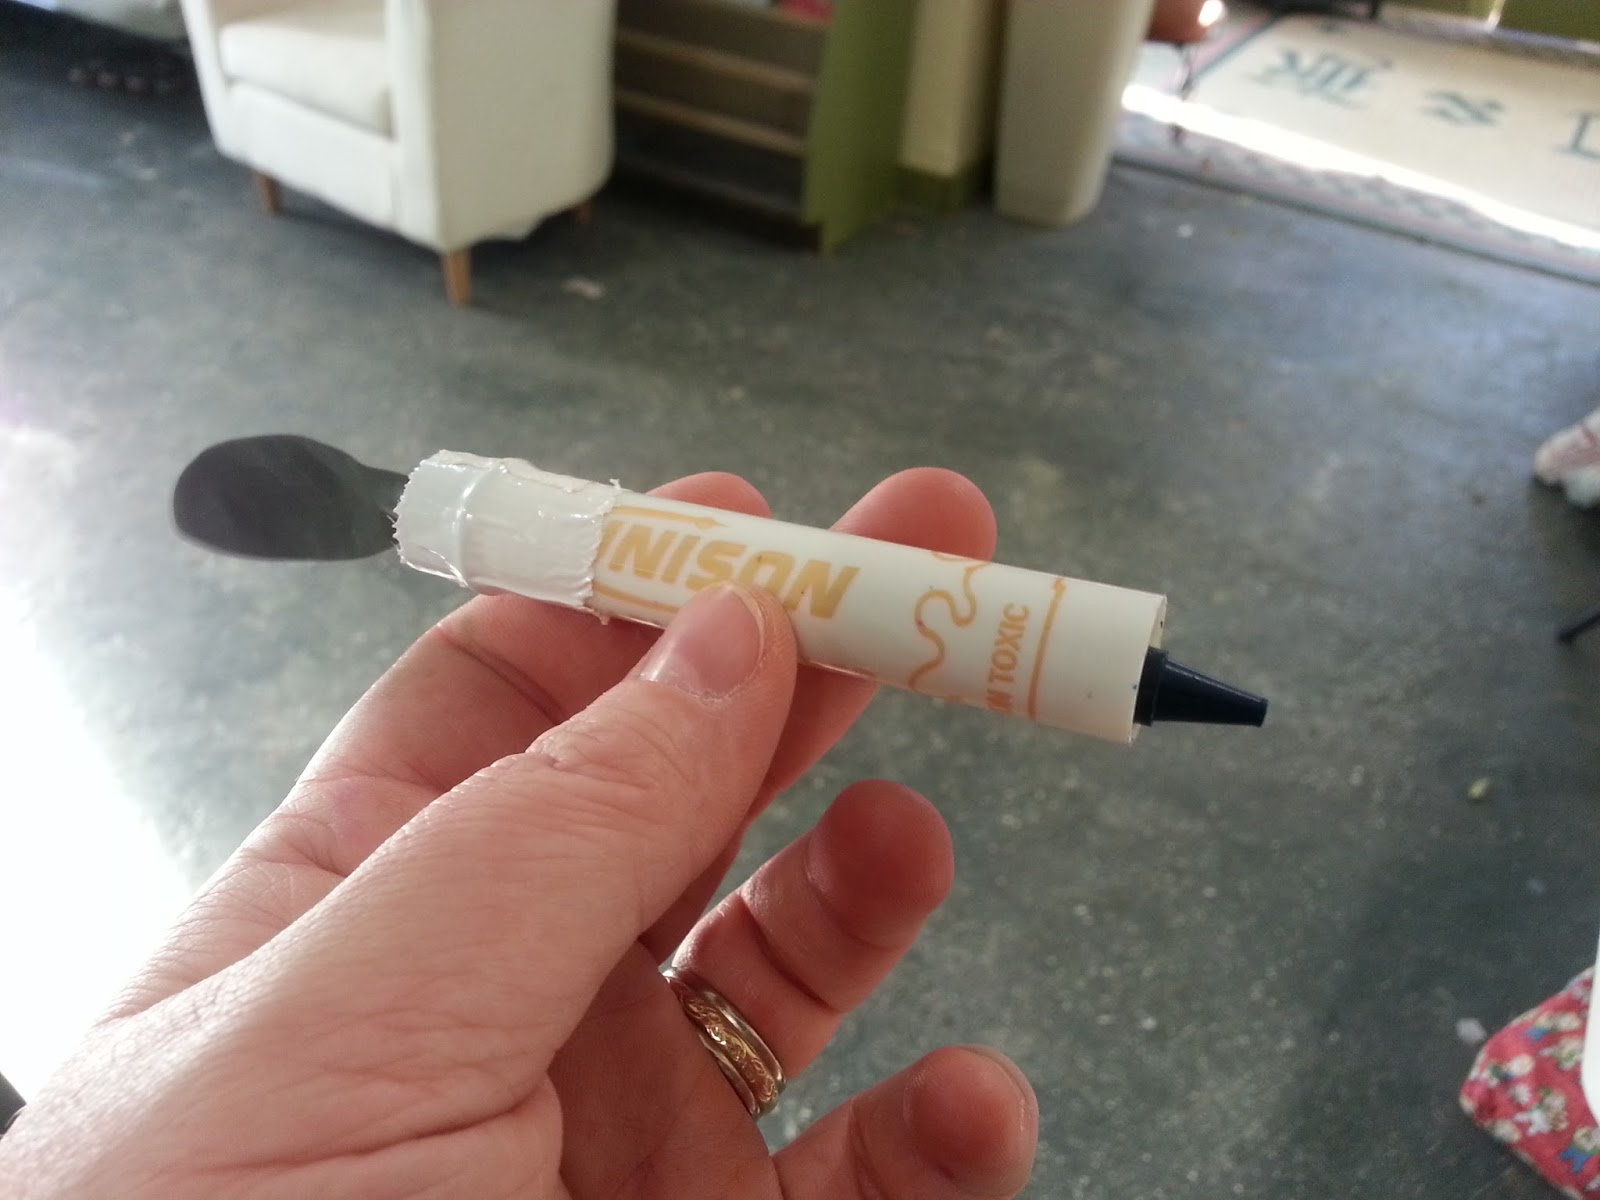
The book has a companion, written by the same author: Mini Weapons of Mass Destruction 2: Build a Secret Agent Arsenal. Once again, the designs are well-written and clearly illustrated and the content encourages a strong DIY vibe. I have made the oragami-style shooting star many times in many settings. And the recycled marker converted to a crayon launcher is pure genius. This book always gives me ideas for my spy classes and parties.
As I was writing this book review, I found that the author is at it again! He's published a third installment: Mini Weapons of Mass Destruction 3: Build Siege Weapons of the Dark Ages. I have, of course, ordered it. I'll let you know what my favorite projects are, just as soon as it arrives!
Our most recent Science and Swim at Belvidere Pool was the most well attended yet! Perhaps the article in the Warren Reporter helped. This week we made sailboats with easy-to-find materials and lots of awesome duct tape then set them afloat in the pool. I swear the toddler pool looked like it had spawned an armada!
To set the mood, let's start with your morning earworm: "Come Sail Away" by Styx.
Now that we're all humming along together, we can get building! First you need to assemble materials: A tray to act as the hull (we used small cardboard ones donated by Nature's Harvest), a bamboo skewer to act as the mast (a small dowel or pencil will also work), lots of colorful duct tape, a small amount of modeling clay, scissors, wax paper for the sail and an old foam egg carton for the rudder.
You start by covering your hull with duct tap, top, bottom and sides. If you want, you can also build up the sides a bit with tape, to prevent water from coming onboard.
Now you need to attach the mast. Make a small ball with the clay and place to towards the bow of the boat. Then stick the skewer into the clay. Mold the clay around the skewer to hold it in place. Cover this well with duct tape. If you have the time and ability, punching a hole in the hull and pushing the mast through a bit, then adding a bit of glue and covering with duct tape will add more stability to your design.
Next we need to attach the sail. I chose wax paper because it's relatively waterproof and inexpensive. That means you can try lots of different sail shapes, if you like. You don't have to stick with the standard rectangle. Try a circle or triangle or a octagon, if you like! Attaching the sail is very simple: just cut two slits in the paper with scissors and slide it onto the mast. If you plan to change shapes often, using a bit of tape to build up spots on the mast to hold the sail in place will suffice. For more longevity, use a bit of scotch tape to hold your sail onto the mast. In either case, be sure to create a "cup" in the sail to catch the wind.
Over the course of our build at Science and Swim, we experimented with lots of ways to make our sails sturdier, as it was pretty windy. One mom had a great idea: putting a strip of duct tape on the top and bottom of the wax paper to add stability. We also experimented with creating tie lines with tape and using materials like old plastic bags and ziplocks for sails. You can even build a sail out completely of duct tape. This is where prototyping is important! Keep modifying that design until you get it to do what you want!
It's also fun to add a rudder, so that you can steer your boat. (This also illustrates an important idea about fluid mechanics, by the way.) To make the rudder, just cut a piece of foam from your egg carton, cover it with duct tape and cut out a small wedge. Then make a slit in the back of your boat and fix the rudder in place. By changing the angle of the rudder, you can change the direction of the boat. It's a lot of fun to experiment with different rudder shapes too!
Then it's time to take the boat to the water and give it some wind! If you have rough waters, you will need to replace your sails, as the wax paper will eventually break down and start to fall apart.
One creative young man, used leftover egg carton pieces to make fun characters for his boat. You can too!
Have fun and enjoy sailing the high seas... or your backyard pool!