Recently I hosted a fun little dance party for the preschoolers in my Friday Funday program. Kids love to dance, so giving them the chance to live it up with their friends, complete with disco ball, is the perfect wake to spice up chilly or rainy days.
There are so many great songs out there for kids, with new artists adding albums every day. And since you can download music directly to your computer or phone, it's so easy and fast to create your own custom playlist.
I love to start with classics. Everyone loves "The Hokey Pokey," and the version by Dan Zanes & Friends on Family Dance is fantastic. I also love "If You're Happy and You Know It" by the Big Kidz Band on Indian Elephant Tea. The camp classic "Father Abraham" from Lisa Loeb's Camp Lisais a great track too. You can also find many versions of "The Chicken Dance," "The Limbo" and "Heads, Shoulders, Knees and Toes" to enjoy.
Another fun participation dance to try is They Might Be Giant's “Clap Your Hands” from the album No. And Raffi's "Shake My Silles Out" is lots of fun to act out. And don't forget great rock and roll songs like Chubby Checker's "The Twist," "Celebration" by Kool and the Gang, "Y.M.C.A." by The Village People and "Walk Like an Egyptian" by The Bangles. Or download a pop hit like “I Like to Move It” from the Madagascar soundtrack and groove.
For some modern dance tracks check out Yo Gabba Gabba's Music is Awesome for fun songs like "Get the Sillies Out." Or try The Fresh Beat Band for danceable tracks like "Music (Gets Me Movin')."
Whatever music you put on, there are some great games you can play too. Kids always love Freeze Dance, where you randomly stop the music and they freeze. You can play Hot Potato too, passing a balloon, ball or other object. Or just get everyone into a circle and give each person the chance to share their moves and take the center. If you have musical instrument, be sure to take those out and let the kids jam along with the tunes.
I can't wait for my next preschool dance party. Until then, my kids and I will have to dance around our kitchen at home. (Making dinner is always more fun that way!)
We all know that toilet paper and paper towel rolls are one of the all-time classic craft supplies in the typical classroom. Which is awesome -- I love toilet paper owls and other fun projects made from these upcycled marvels. But what about using such humble supplies for science? Here are five projects
to try at home.
Ok. One toilet paper roll owl. I can't help myself.
Marble Slides -- Break out the masking tape and get ready to have some fun! Using whole and halved rolls, junior designers can attach tubes to any wall creating multi-layered slides for marbles to zig-zag towards the floor. If you want to get some motion going, try attaching rolls to foam board using brass brads or tacks!
Spectroscope -- Find all the colors of the rainbow in white light. Using black construction paper, cut a circle the size of the paper towel roll opening. Cut this circle in half. Tape half of the circle to one end of the roll, being sure to tape well around the edges. Attach the other half circle to the same end, leaving a narrow slit across the center. Again, tape well at the edges. Now,with your eye at the open end, look at a CD held near a light source (an incandescent bulb just behind the bulb is great). The CD will diffract the light, breaking it into a rainbow that you can see through the slit. Wow!
Kaleidoscope -- Cut you paper towel tube to 8 inches. Longer will make it tough for enough light to travel to the eye. Use black construction paper to cover one end of the tube. With a pencil, poke a hole in the paper. Use clear tape and apiece of clear cellophane or acetate (a report cover, a transparency, etc.) to create a triangular tube that will fit inside the tube. Slide it in. Cover the other side of the tube with plastic wrap, pushing it down to make a little pouch and securing it with tape or a rubber band. Add beads, sequins, gems or anything small and shiny. Cover with another piece of plastic wrap and secure in place. Now hold it to the light, look through the hole and enjoy the power of reflected light as it creates an amazing display!
Telescope -- Using construction paper create a roll that can just fit inside the paper towel roll. Ideally, you'll want two double-convex plastic or glass lenses, one 150 mm and the other 300 mm. If you can't come by those, try magnifying glasses - one larger and weaker and the other smaller and more powerful. You may have to experiment with different options. Tape the smaller lens onto the construction paper tube. Tape the weaker one onto the cardboard tube. Then fit the open end of the construction paper tube into the open end of the cardboard tube. Look through the stronger lens. Move the construction paper tube in and out until the object you're looking at is focused.
Pulley Towers -- Grab some old thread spools, bamboo skewers, cotton string and toilet paper rolls to explore one of the most fun simple machines. Use the rolls to make two towers -- feel free to go big, stacking two of three rolls together. To form the base, cut slits into the bottom of the tower, spread out the "feet," then tape them to a table. Thread the spools onto the skewers and place them between the towers, poking holes into the cardboard as needed. Then it's time to play! Use the string wound in various ways through the pulleys to see how the number and placement of affects the what you can lift.
That is one complicated pulley system!
Whew! That's a lot of fun with paper towel rolls. I'm going to take a bit of break. Come back later this week for 5 MORE fun ideas!
When we started talking about our garden for the year, my girls were adamant about growing cherry tomatoes. Usually I do a few heirloom slicing tomatoes, a few Roma's for sauce and then various grape tomatoes, like Yellow Pear, for snacking. This year, though, they wanted proper cherry tomatoes.
Following on that though, the girls has another: Wouldn't it be awesome to sell tomatoes at the Farmer's Market? The kids and I spend a fair amount of time at the market over the summer and early fall, because I do free crafts and games for kids at the Blairstown market. To my girls, selling at the market is pretty much the apex of vegetable growing. It is somethign to aspire towards.
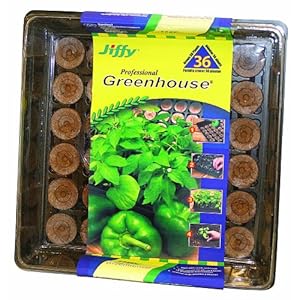
Obviously, I couldn't let that ideas get away. So, off we went for seeds and starter trays. The trays turned into quite the discussion at the store, because there are so many different types available now. It was a great opportunity to talk about "value added" items and how you can trade money to save time or make up for minimal expertise by selecting more expensive items. In the end, the girls selected a fairly inexpensive Jiffy seed starter greenhouse set.
We also spent time comparing the various tomato seeds and discussing why organic seeds are more expensive that conventional. This led to a talk about the practices used by different seed companies. And, of course, there was a discussion about the various varieties of cherry tomatoes available, planting times, days to maturity, etc. All of which led to a discussion about why it may be a better idea to research seed companies and use mail order catalogs next year, both for better price and better selection.
The next day we got to work planting the seeds. The girls wanted to know why you plant multiple seeds in each pot, then cut all but the strongest later. It was a great chance to review the fact that not every seed germinates and that you want to only keep the one strongest plant, rather than allow all the plants to compete for resources like water and sunlight, making them all weak. In total, we were hoping to have 36 cherry tomato plants!
By the way, I wanted to share a handy tip, for planting any smaller seed, passed down from my dad. We used toothpicks to make the tiny holes needed for the seeds. Then, touching the wet toothpick gently to the seed picks it up and makes it easy to transfer to the soil.
We also took to time to figure out a budget for how much their tomato business would cost to start and operate. We determined what the cost would be per pint of tomatoes we raise, and what we planned to charge for the produce. We factored in the cost of the initial seeds and pots, the soil, water and fertilizer over the season, pint containers to sell the tomatoes in, and even a fee to the market for selling our tomatoes. In the end we set a goal for how much we hope to make off of the project, after paying back expenses.
Before long, our plants germinated! Huzzah! Lots of leafy green. But the girls noticed that not every soil pellet had a plant. So I set Caitie to the task of counting those that had grown and we created a pie chart based on the data. We also talked about how we could calculate and express our germination rate. Now they're ready to go in the ground, and we'll be watching to see how they do from here.
Our family recently bought a shiny new iPad 3. For the kids education... totally. It's an amazing device, of course. My girls took to it quickly, playing games and exploring. One thing my eldest daughter wants to do is make movies, and I'm hoping that the iPad will give her some tools for that purpose. Caitie and I decided we'd give cartoon making a try first.
There are dozens of apps out there for making everything from simple cartoons to professional animation, with price tags ranging from free to, well, not, ahem, free. In this post, I'm going to focus on free apps that are easy enough for children ages 6 and up to use, but offer enough of a fun factor for older kids (and parents) to enjoy and that require little or no drawing skill.
Toontastic by Launchpad Toys. FREE app. Additional character sets $0.99 to $1.99. All Access for $9.99.
This was my first find, and it remains my favorite. Toontastic works like a puppet show. Pick your background and characters, place them in the scene and record. You can move the puppets around and record your voice. The app lets you resize the individual characters, change their colors and move specific limbs, if you like. You can even draw your own backgrounds and characters if you prefer, using the simple paint program provided. Once you've recorded a scene you can add background music as well. String together as many 1-minute scenes as you like to create your movie.
The app comes with a several backgrounds, characters and props from several different themes that you can mix and match. You can add additional sets for between $0.99 and $1.99. There are presently over 30 sets, each with a background and selection of 2-3 characters and assorted props. Themes include fairy tales, pirates, historical figures, space and rock and roll. For $9.99 you get complete access to all current and future sets.
So why is this app my favorite? It hits a nice balance between being simple enough for my 8-year-old to use it completely independently, while offering enough customization for older users. I also LOVE that when you go to create your video, it explains the basic parts of a story and helps the user lay out a story arc. This is great for children as an educational tool. (Toontastic has a free guide for parents and educators interested in use the app for lesson planning.) Lastly, as a parent, I get notification when my child wants to publish a video to the product's ToonTube, and let's me approve it. Since my kids are still young, I appreciate knowing what they're creating and sharing. That said, uploading to the website was very easy to do, and the notification email provides a simple link to share with family and friends.
On the downside, I will say that sometimes the movement of characters "jams" while recording, and it can be difficult to move arms and legs. I also had trouble orienting the characters to match the backgrounds, and getting the characters to turn as I wanted. There is certainly a learning curve to get the best out of the product, but my kids didn't seem to mind that their cartoons weren't "perfect." And, honestly, neither did I. Toontastic was a win for function and price.
Puppet Pals HD by Polished Play, LLC.
FREE app. Additional character packs $0.99, or Director's Pass for $2.99.
Puppet pals is similar to the above Toontastic, but is definitely meant for an older audience, as it includes political characters and talk show hosts as characters, and the graphics are more gritty and mature. Like Tonntastic, you pick your background (all photographic), add your characters and then record to animate and add voiceovers. Rather than recording short scenes and putting them together, Puppet Pals allows for one long shoot. The app exports to the Camera Roll on the iPad, and from there you can upload it to various online locations, like YouTube.
I did like that it was easier to flip the characters in Puppet Pals, using a simple double tap. And the motion was smoother than in Toontastic. You could also resize characters, and even leave them off the background, pulling them in and taking them off at will. But you couldn't move the limbs or the characters, or change them in any way. You can't add music later within the app, which is a bit of a bummer. You also only have access to one pack of characters, the Fairy Tale pack, with the free app, so there isn't much variety.
Puppet Pals does have one advantage over Toontastic: you can take your own pictures, using the iPad camera, to use as backgrounds. You can even take pictures of people, pets, etc. and use them as characters. (The app allows you to cut our character out from the background.) However, you can only use those features if you pay $2.99 for the Director's Pass version of the program. I could see that as being a really fun feature, and the price point isn't very high.
The pass also gives you access to all the additional character packs, both present and future. Packs, individually available for $0.99 each, include 5 to 7 characters and a background. Themes include monsters, pirates, political and pop-culture, zombie and wild west. Though Puppet Pals is available for free, the Director's Pass holds the majority of the fun.
Sock Puppets by Smith Micro Software, Inc. FREE app. Additional content from $0.99 to $4.99.
This app is the simplest of the bunch. With Sock Puppet, you set up your background, pick you puppets, pick your props and scenery, then hit record. You tap on the puppet you want to speak for and when you talk, the app automatically lip-syncs the puppet to your words. Very cool! You can record up to 30 seconds, then the app "scrubs" your voice to make it more cartoon-like. Both photorealistic and animated elements are included, though only some props can be moved during recording. You can resize your puppets too.
The app comes with 6 puppets and 7 backgrounds. In the store, you can buy additional puppets for $1.99. You can also buy upgrades like additional recording time ($0.99 for 90 seconds) or the ability to import your own background ($0.99). Halloween and Alien packs with additional characters, backgrounds, props and scenery are $0.99 each. A VIP Content Pass is $4.99 and inludes all available content and provides as new releases for free.
Of those I cover, this app would be the easiest and most amusing for a younger child. All you need to do is make sure you're speaking into the mic. It also disguises your voice very well, so you don't need to worry about sounding too different for each character. The app takes care of that. It's pretty easy to upload online as well, directly to YouTube or Facebook. Sock Puppets is the quickest to learn and provides immediate gratification.
I may be no artist, but even I had a lot of fun making my own short cartoons. With these free apps you can let your child's imagine fly. And all of them would be excellent for teaching basic storytelling as well. Have fun!
After falling trees, floods and freak snowstorms, Kaleidoscppe has had a lot of trouble settling into a space for classes. We've been very lucky to have the support of our community, particularly that of EcoZOica Consciousness Lounge, who provided us with space for programs while we waitied for renovations to be completed.
Though our little yellow building is still in the works, we have been able to complete a cozy space nearby. Kaleidoscope is now operating out of the first floor of 2 Footbridge Lane, the large red building where Dr. Magalio's dentistry practice is housed. We like to call it "The Annex." There we have a large classroom, a smaller playroom, and a tidy bathroom.
Work will continue on our larger space, but at least we have a home!
When I was in elementary school, we seemed to get assigned a lot of dioramas. It seemed like the diorama and the book report were the de facto methods for summarizing a reading assignment. I can't have been the only one who experienced this phenomena. Heck, it's a running gag on the sitcom Community.
"I can't believe our assignment is to make a diorama of us making a diorama."
So maybe for the Gen X parents of today, the humble diorama may seem cliched. I get that. But here's the thing: I LOVED making them. There were no better words a teacher could utter than, "You can make a diorama." It was like heaven.
I distinctly remember working on an interactive diorama with a moving shark in honor of the amazing book, "Shark Lady: True Adventures of Eugenie Clark." There was also a story about a leprechaun and tying red scarves around trees to hide a pot of gold. I barely remember the story, but I do remember carefully placing trees in my little shoebox and tying tiny strips of red cloth around every one of them.
As I got a bit older, my love of miniature grew to encompass dollhouses. Ah dollhouses! It's like a diorama with lots of shoeboxes strung together! And you can play in it! My Dad and I spent one Christmas break building a dollhouse together in the basement. I've loved it ever since. It's taken years to decorate and furnish it, not that I'll ever be done! My dollhouse has a home now in my basement. Though I've let them look, I haven't yet been brave enough to let my daughters touch my precious dollhouse. I'm working on it. I think it may be easier to build another.
And who can forget the wonderful dioramas at the American Museum of Natural History. As a kid, we took a school field trip there, and walking into the first hall just blew me away. I'd never considered making a life-sized diorama. With REAL stuff! Through those exhibits I visited the plains of Africa and the Arctic tundra. It was amazing. It sparked the young scientist in me and solidified my future as a biologist. And thanks to Stephen Quinn, I can read about how they were made and enjoy these amazing Windows on Nature any time I like.
The bears were my favorite. I have a deep love for bears.
Coming forward to the present day, I still love dioramas. I was planning a new one just yesterday. It'll be a small theater and will feature actors that can be moved with a magnetized wand under the stage. I'm hoping to have it finished as a gift for Gwen by Christmas.
Anyway, let's get your creative juices going too! Below are some great links to get your started.
This whimsical Winter Lake project isn't technically a diorama, but I think it incorporates many of the ideas. I love that it's also interactive and a great sensory play idea for young children. "Crafting a Nature Inspired Up-cycled Diorama" is more classic in form, but uses natural and found objects that the child strings together to create a story. Love it! Perhaps you want to go totally "old school." That's ok too. There are many resources available. One of my favorites is Enchanted Learning. Looking for a more grown up approach to dioramas. We can do that too. The Diorama Man has the most incredible website, filled with tons of ideas and instructions on making detailed dioramas!
Before I leave you, I wanted to share one last tidbit. The video below features the Bedford Gallery, which hosted an exhibition called The Art of Diorama. There are so many approaches to the form, and so many interesting stories about the artists and their process. It's certainly worth taking a few minutes to enjoy.
Have a great day everyone. If you spend some time making diorama this weekend, please don't be shy! Come on back and share some pictures of your work!
As I believe I have mentioned before, I LOVE Halloween. So of course, I wanted to do something special for the girls when I packed up their lunchboxes on October 31st!
I started with the citrus. It's really easy to use a sharp knife to carve little jack-o-lantern faces into the rind of oranges or clementines. They'd dry out if you left them out for too long, but they'll survive to lunch time without a problem.
Next up, the main event: a classic PB&J turned into a spooky ghost. I just made my usual sandwich, being sure to use gooey strawberry jam. Then I cut with a favorite cookie cutter. Use a little peanut butter to stick on dried cranberries as eyes and place into the reusuable container with black bean chips to create a backdrop. (I used scraps of wax paper to secure everything into place when I packed it up.)
On to the treats! I pulled out my cookie cutters again to cut a piece of cheddar cheese into the shape of a bat. Then I wrapped up some roasted pumpkin seeds in a bit of wax paper (secured with invisible tape) and topped the packet with a cute sticker.
Once that was all packed up, I made some quick Happy Halloween cards. I just ran premade cards through my embosser, inked the front to add depth and then added some sparkly stickers. I stamped the inside with a sentiment and wrote in "Love, Mommy and Daddy!" I slipped that into the lunch box and called it a day. Happy Halloween!
We have to do something equally fun for dinner. We're planning Hotdog Octopi in tomato sauce, served with sliced orange and green bell peppers. Should be pretty creepy and super quick, so we can get out to trick-or-treat!.
On the last day of the Blairstown Farmer's Market, a big Harvest Festival was planned. Pig roast, trick or treat, great crafts! And then the weather man predicted snow. Did the festival get postponed or cancelled? Heck no! Intrepid souls showed up and set up, defying the oncoming storm! "You may be right, I may be crazy..."
So I handed my 8-year-old daughter, Caitie, my camera and set her out to take photos of the a truly unusual day. This is the kind of experience that our kids will still be talking about 40 years from now. "Remember when we went trick-or-treating in the snow at the Farmer's Market??
Despite the crazy weather, the event pushed on, keeping pretty close to schedule. The crafts, the pig roast, the bluegrass band...
Despite the cold, the vendors kept on selling,as if it was perfect summer's day, making sure the brave, winder-clad customers got all that they needed, despite the weather...
As for the kids, they had a fabulous time! They had snowball fights, caught snowflakes on their tongues, danced and just generally had a blast, despite how wet and cold they were. The dogs and the adults seemed to have a pretty good time too.
So, it was weird day, but a good day. A magical day. The only downside was that we had to pack up early and didn't get to say goodbye to all the friends we'd made this season. But hopefully we'd traded information, or would be getting together for the winter market. What a crazy end to another wonderful year of the Blairstown Farmer's Market!
According to Caitie, "This is a day I'll always remember." That is a good, good thing!
This summer and fall, Kaleidoscope has had a tent at the Blairstown Farmer's Market, hosted by the Foodshed Alliance, in the heart of our town. It's a small market, but well-loved. Every week I schlep in our canopy, tables and assorted craft materials to share freely with children at the market.
I got to experience first-hand what Michael Pollan, popular author of In Defense of Food and The Ominvore's Dilemma has been holding up as a gold-standard for local food. As he explains "By shopping at a farmers market, you support local agriculture, which has a great many benefits. You keep farmers in your community. You keep land from being sprawled with houses and shopping centers. You have the experience of shopping in the farmers market, which is the new public square. You support a lot of values when you shop at the farmers market."
See, my favorite thing about a farmer's market isn't the just food, it's the people. Everyone has a story. Take Lou Tomasso as an example: he's the owner of LL Pittenger Farms and the only man from whom I'll buy beef. Lou knows his cattle, his farm, his heritage and his food. He's proud of what he does, and it shows. Heck, the man posts pictures of the new calves every year on Facebook! I can skip the market for weeks, and he'll remember my name and favorite cut. He'll give me a break on a porterhouse, because I'm a regular. He'll tell me the best way to grill my London Broil. I know how he raises his animals in open fields. I know how he grows the hay they get in winter. I feel connected to my food, and I feel blessed to have it and the people who raise is.
But I don't just talk to the farmers. When you go to a market like ours, you'll find that there is always some friend there to chat with. Maybe you haven't seen them all winter, but now you can stand in the sunshine, fresh leafy produce in your canvas bag, and catch up. You can extol the many virtues of kale, taste test cheeses for an upcoming party, and figure out what the heck you do with bok choy. The market is a powerful place of connection.
To be a part of the market every week has been so exciting. We painted, colored, collaged and stamped. We explored fossils, built catapults, played games and compared leaves. We blew bubbles, chalked the parking lots and dressed up in costumes. And we did it under both blue skies and gray (including one hurricane named Irene). I made friends with whole families of farmers and market shoppers, because my tent provided a fun, safe place for their children to create.
My daughters were able to wander the market independently, trying the samples (sometimes two or three times at Sugh's Southern Sweets), meeting the farmers and playing with other children. My 8-year-old soon took on the task of planning the meal and buying food for our Saturday night dinner, with a budget and guidelines from mommy, of course. (Two veggies, only ONE dessert.) The market became a kind of home for the kids, and in that way, it became my home too.
Even more impressive was watching a group of "market kids" (children whose parents worked at the market) provide support for others. They helped set up tents and tables, manned the Foodshed Alliance's booth to sell shirts and even stood in for a farmer one day and sold produce on his behalf. (And, man, could those kids haggle!) These children all stepped up and became responsible for their market, for their local food economy, for their food. What better lesson could they learn?
So, I'm looking forward to this weekend's All Hallows Harvest Festival complete with pig roast, hayrides, cider making and music. And in November, the area's first winter farmer's market will be coming to Newton! We get to keep the fun going all season long! Suffice it to say, it'll be worth schlepping tables around Warren county.
I love Halloween. Seriously, I love it. Taking on a new persona for a day. Planning a costume for months. Making creepy decorations. Transforming my home into a spooky scene. And let us not forget the chocolate!
When I had my daughter, Caitie, I made her the cutest darn Winnie-the-Pooh costume for her first Halloween. Oddly enough -- what with nursing constantly, changing a neverending stream of diapers and constant sleep deprivation -- I didn't get much time to decorate. But I did (re)discover the cute in Halloween. All was well.
That was, until the following year. Caitie was about a year and half old. As she played in the leaves, I decorate the outside of the house with my standard grim reaper and giant spider. The problem was when she stopped playing in the leaves and saw my morbid creation... and burst into hysterical tears. Clearly, Caitie did not enjoy the dark side of Halloween.
My reaper and spider were sent to languish sadly in the garage. And we went off to the local department store for some happier decorations. Caitie chose colorful, smiling, corn-husked scarecrows. Happy and cheerful. Not my vision of Halloween, but what can you do?
So, for years my yard has been a haven for wrangly, dangly scarecrows. The collection has grown, because I can't help but throw myself into anything Halloween. On top of that, I have made pretty fairy and princess costumes by the ton. The glitter. The rhinestones. The pink tulle. It may not be a horror show, but Caitie -- and her little sister, Gwen -- understood the most fun premise of Halloween. It's your opportunity to transform. And eat chocolate.
Last year, something odd began to happen. You see, Gwen is not Caitie. (Kids have a weird way of becoming individuals.) Gwen fell in love with the movie "The Nightmare Before Chirstmas." Gwen likes spooky. She likes scary. She LIKES grim reaper decorations! Granted she still wanted to dress up as a fairy, because that's what her older sister was doing, but a shift was certainly happening. Scarecrows beware!
Which brings us to 2011. Gwen is helping me make a scary mummy costume to wear this year. Caitie actually wants scary decorations. They want a jack-o-lantern with the face of a wicked witch. Suddenly, we all agree on Halloween! I can pull Ole' Grim out of the garage! Oh glorious day!
Then my mommy brain stepped up, late one night. She had noticed that my girls, Caitie especially, were growing up. Caitie now had bigger fears than plastic spiders. Real fears. Fears of fitting in. Fears of doing well at school and remembering all her lines for her play. Fears of being pretty enough, or smart enough, or both. I can calm many of those fears and help her learn to process them, face them, overcome them. But they are real. The transformation from toddler to big kid is real.
Soon she won't want to trick or treat with me anymore. She'll want to be with her friends. She won't want me to make her costume with her. She'll just do it on her own. Or buy one at Party City. And soon, far too soon, she'll want to skip Halloween all together, because it's not "cool."
So this year, I still put out my scarecrows, right along side the reaper and the spider. I'm trying to squeeze every moment of Halloween fun from the end of the month. Time is precious. Time with my girls is my harvest. And those scarecrows remind me of how quickly childhood can pass.
I think it's time to build some new scarecrows of our own. Of course we can take out some old clothes and stuff them. I've found that grocery bags filled with newspaper and attached to a frame of 1x2 wood with duct tape works well, and is easy to recycle later. For inside I want to make miniature versions. Since I always seem to have popsicle sticks and leftover fabric around, I think I'll try this Wee Scarecrow Craft from About.com.